作者:bt_
原文链接: https://blog.csdn.net/botao_li/article/details/103901856
* 本文由作者授权转发,如需转载请联系作者本人
主要参考:ug1400
安装串口调试软件
安装串口软件 tinyserial
![](http://xilinx.eetrend.com/files/2020-03/%E5%8D%9A%E5%AE%A2/100048248-92730-01.png)
本人使用 Qt 5.12.6 编译后使用(deb 安装后无法运行)。
建立 Platform Project
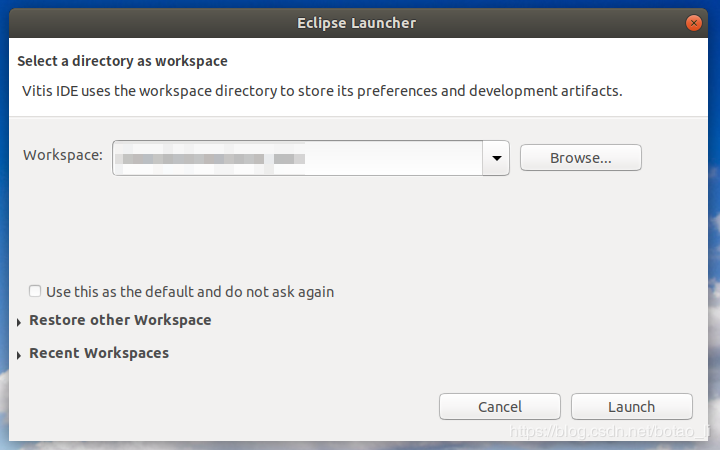
启动 Vitis Software Platform,设置 Workspace 路径后点击 Launch 按钮。
![](http://xilinx.eetrend.com/files/2020-03/%E5%8D%9A%E5%AE%A2/100048248-92731-02.png)
进入 IDE 后在菜单栏选择 File > New > Platform Project
设置 Project name 后点击 Next 按钮
![](http://xilinx.eetrend.com/files/2020-03/%E5%8D%9A%E5%AE%A2/100048248-92732-03.png)
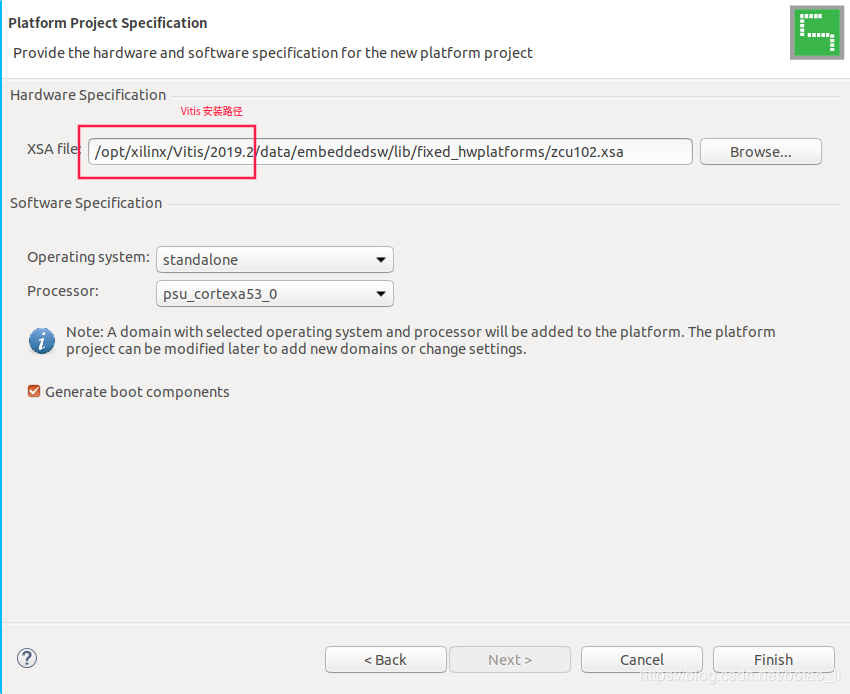
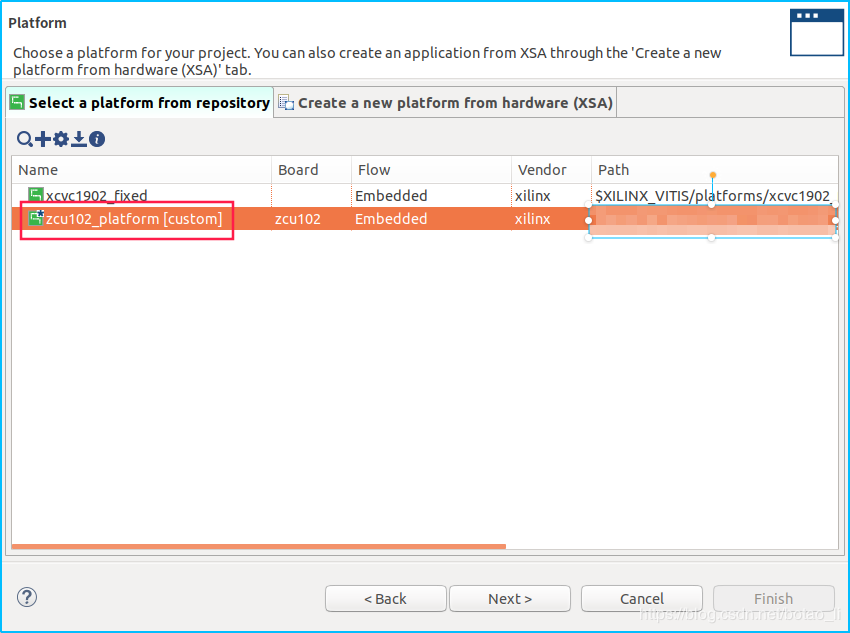
选中 Create from hardware specification (XSA) 后,点击 Next 按钮
![](http://xilinx.eetrend.com/files/2020-03/%E5%8D%9A%E5%AE%A2/100048248-92733-04.png)
点击 Browse 按钮后在以下路径选择 zcu102 的默认 XSA 文件
选择 Operating system 为 standalone
选择 Processor 为 psu_cortexa53_0
点击 Finish 按钮
![](http://xilinx.eetrend.com/files/2020-03/%E5%8D%9A%E5%AE%A2/100048248-92734-05.png)
进入 Eclipse 的 Desgin 界面
![](http://xilinx.eetrend.com/files/2020-03/%E5%8D%9A%E5%AE%A2/100048248-92735-06.png)
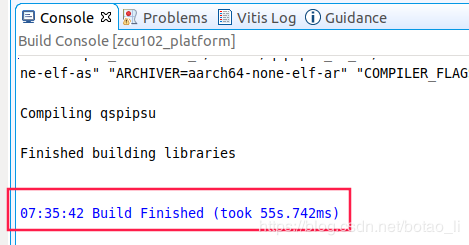
在 zcu102_platform 工程打开右键菜单选择 Build Project
完成后显示
![](http://xilinx.eetrend.com/files/2020-03/%E5%8D%9A%E5%AE%A2/100048248-92736-07.png)
建立 Application Project
在菜单栏选择 File > New > Application Project
弹出窗口中设置工程名称,然后点击 Next 按钮
![](http://xilinx.eetrend.com/files/2020-03/%E5%8D%9A%E5%AE%A2/100048248-92737-08.png)
选中之前建立的 Platform Project,然后点击 Next 按钮
![](http://xilinx.eetrend.com/files/2020-03/%E5%8D%9A%E5%AE%A2/100048248-92738-09.png)
接下来的页面保持默认,点击 Next 按钮
![](http://xilinx.eetrend.com/files/2020-03/%E5%8D%9A%E5%AE%A2/100048248-92739-10.png)
选中 Hello World 模板后点击 Finish 按钮
![](http://xilinx.eetrend.com/files/2020-03/%E5%8D%9A%E5%AE%A2/100048248-92740-11.png)
在 Explorer 中出现 hello 工程,双击打开 helloworld.c
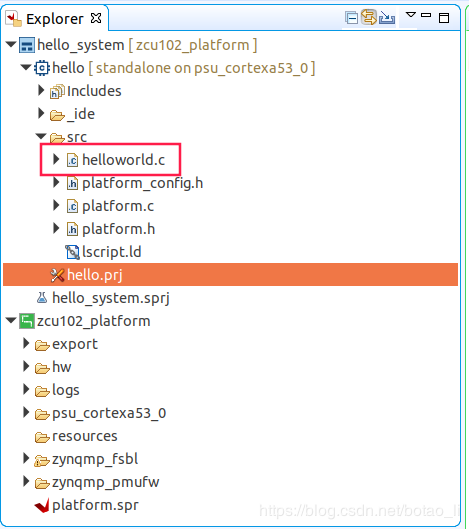
![](http://xilinx.eetrend.com/files/2020-03/%E5%8D%9A%E5%AE%A2/100048248-92741-12.png)
修改原始代码为框内代码
![](http://xilinx.eetrend.com/files/2020-03/%E5%8D%9A%E5%AE%A2/100048248-92742-13.png)
在 hello 工程的右键菜单中选择 Build Project
验证
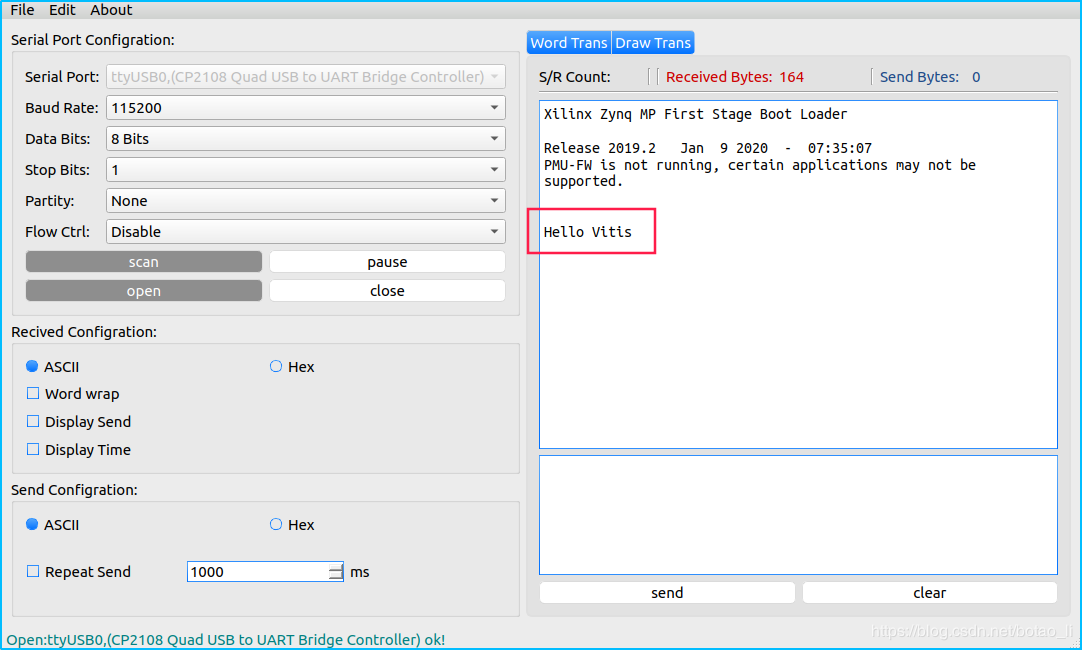
连接 zcu102 板卡的 JTAG 线和 UART 转 USB 线至主机后给板卡上电
打开 tinyserial 软件,按下图配置并且点击 open 按钮
![](http://xilinx.eetrend.com/files/2020-03/%E5%8D%9A%E5%AE%A2/100048248-92743-14.png)
在 hello 工程的右键菜单中选择 Run As > Launch on Hardware (Single Application Debug)
在 tinyserial 中收到 Hello Vitis 的串口数据
![](http://xilinx.eetrend.com/files/2020-03/%E5%8D%9A%E5%AE%A2/100048248-92744-15.png)