本文转载自:OpenFPGA微信公众号
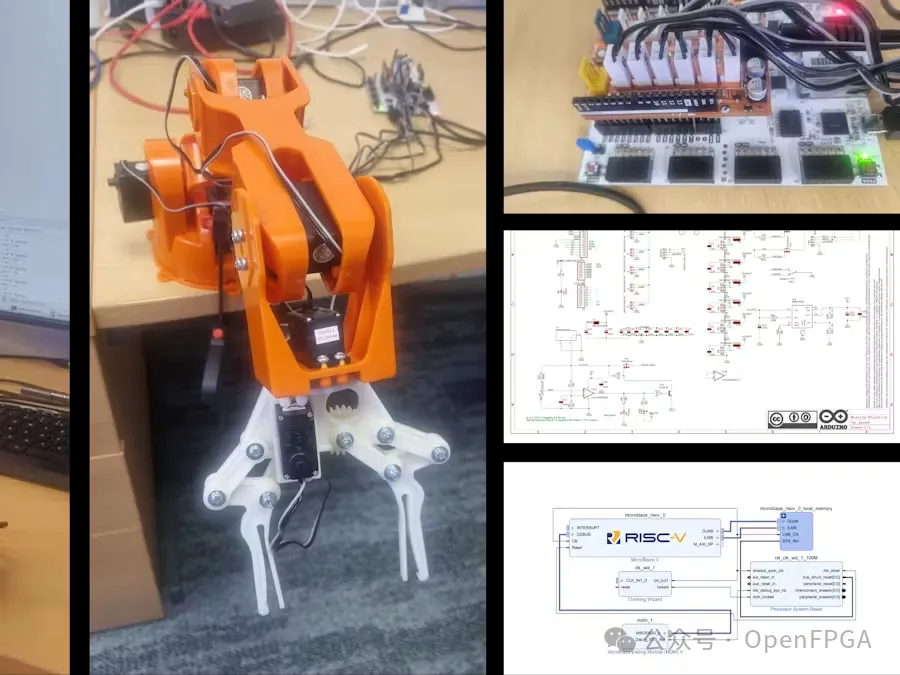
今天研究如何使用 Python + 低成本 FPGA 开发高性能、精密的机械臂。
简介
由于 FPGA 具有并行特性,它在精密电机控制和机器人领域表现出色。本文是探索开发基于 ROS2 的解决方案,让机器人可以在白板上自主书写文字。
在这个项目中,将展示如何创建一个具有以下功能的机械臂应用程序:
. 通过 FPGA 控制手臂上的 6 个轴关节
. 通过远程机器上运行的 Jupyter Lab 实现对机械臂的控制
. 通信链路为 RS232 - 可使用 LwIP 扩展到以太网
. 在 Jupyter Lab 中跟踪轴定位信息
. 能够将手臂的位置存储在文件中
. 能够重放存储的文件,以根据应用程序的要求驱动手臂完成一系列动作
. 能够控制选定的关节从一个位置移动到另一个位置
设计流程
本项目将采用的方法是在 FPGA 逻辑中创建 AMD MicroBlaze™ V 处理器,处理器将执行命令行解释器(CLI),接收关节的角度并更新特定关节的驱动逻辑。
使用这种方法,可以轻松更新 CLI 以支持使用 LwIP 和以太网命令,实现长距离远程连接。
手臂上的每个关节将被标记为 A ~ F,通过 UART 链路发送的协议是:
其中 Joint 为 A~F,angle 为 0 到 180,CR 为回车符,LF 为换行符。
在 FPGA 内部,使用一个简单的 RTL IP ,生成控制电机所需的 PWM 信号。这就要求在处理器上将角度转换为驱动信号。
伺服器以 50 Hz PWM 周期(20 ms)运行。在这 20 ms中,PWM 周期标称开启时间为 1.5 ms,将使伺服器位置处于 90 度点,通常称为中性位置。将开启时间减少到 1 ms将使伺服器移动到 0 度点,而将其增加到 2 ms将使伺服器移动到 180 度点。
因此,该伺服机构有 180 度的潜在运动,粒度为每度 1 ms/180 = 5.555 us。
接线
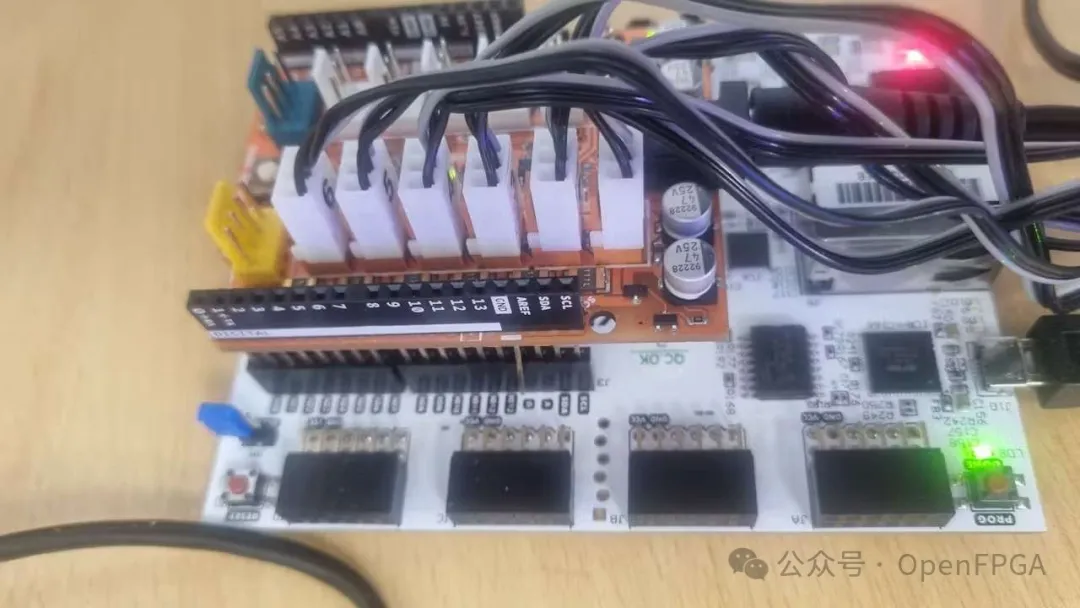
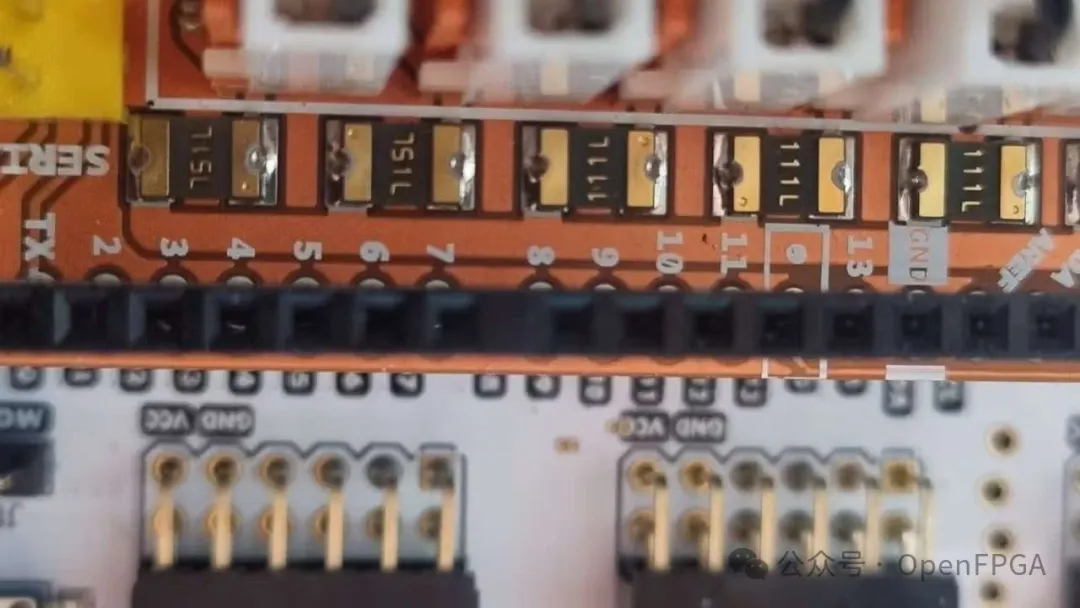
所选的机械臂使用 Arduino 接口板与 Digilent Arty A7 / S7 板连接。它可以通过接口板从外部供电,也可以通过接口板上的连接器提供的 5V 供电。
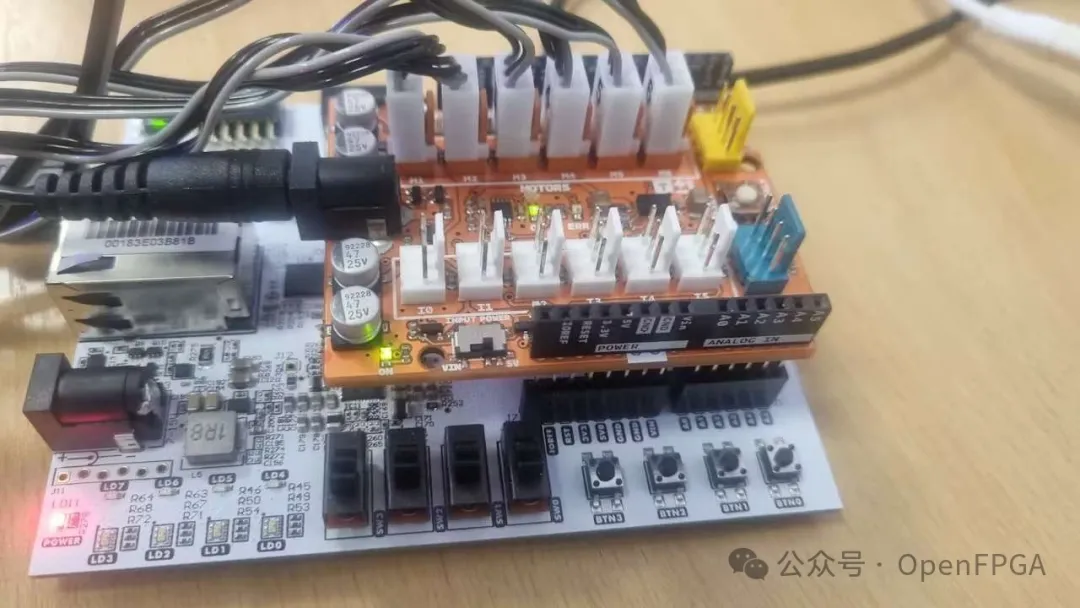
由于 5V 电流通过接口板连接器会限流,并且电机可能要求较高,因此本次使用外部DC电源为机械臂本身供电。
Vivado设计
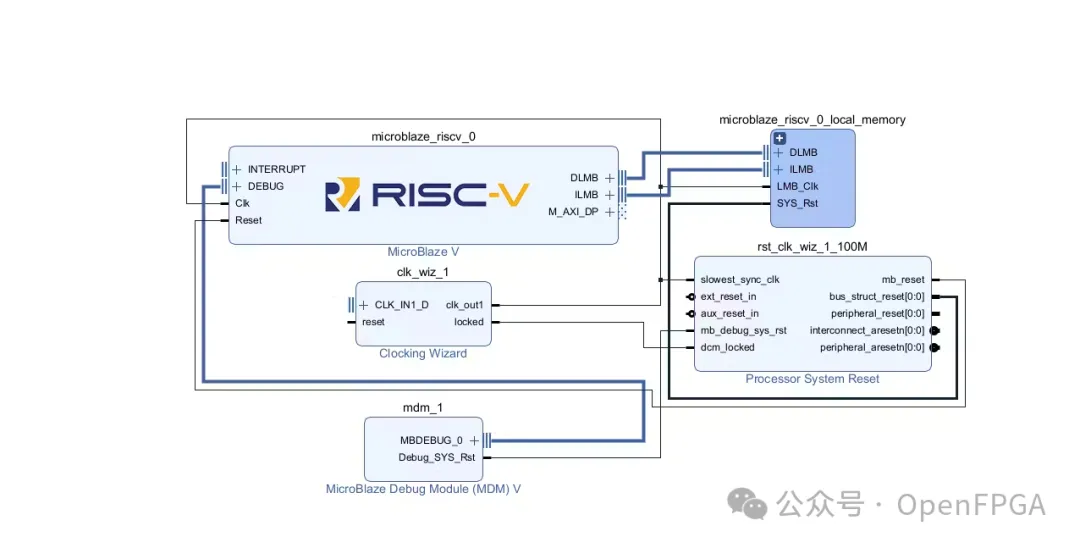
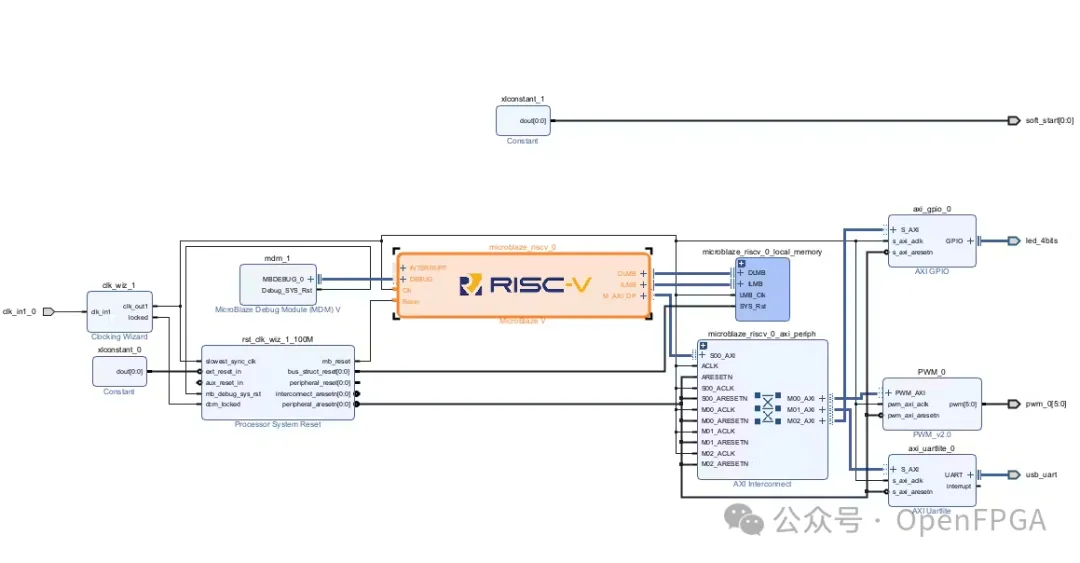
Vivado设计比较简单,添加 AMD MicroBlaze V 处理器及其外设即可。
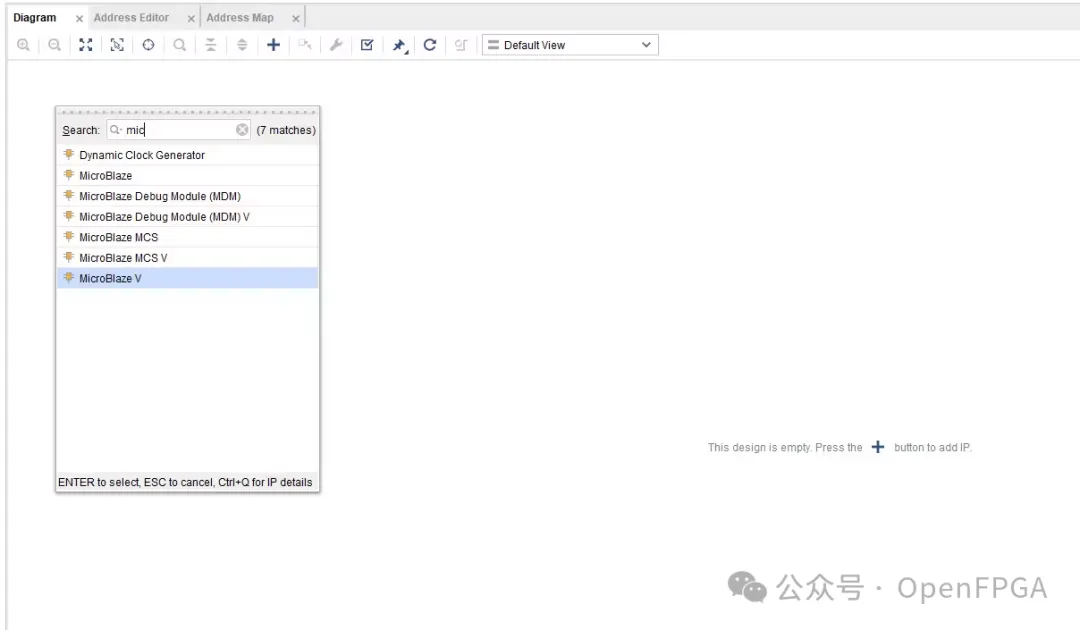
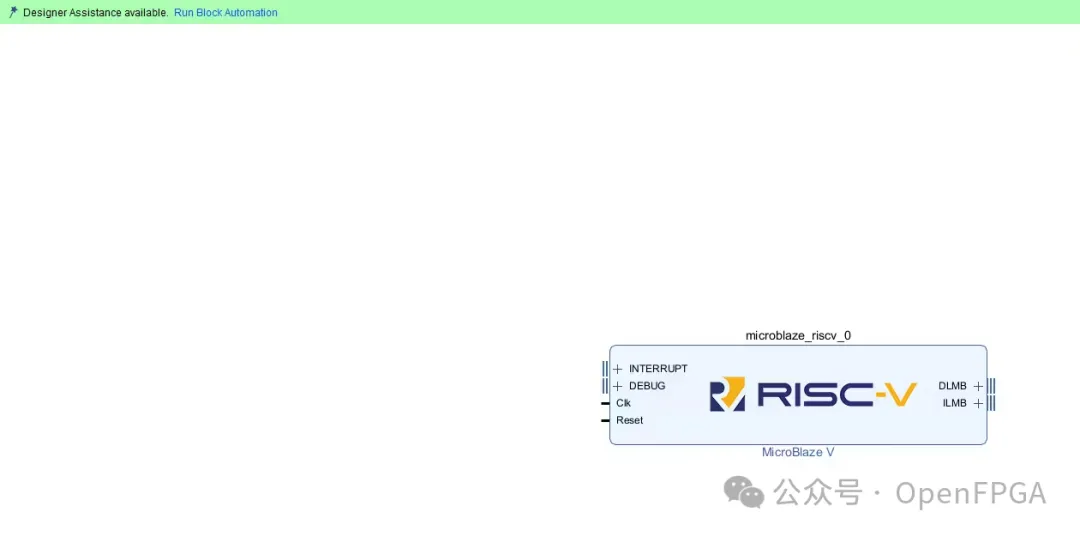
AMD MicroBlaze V 添加后,单击运行自动化设计。
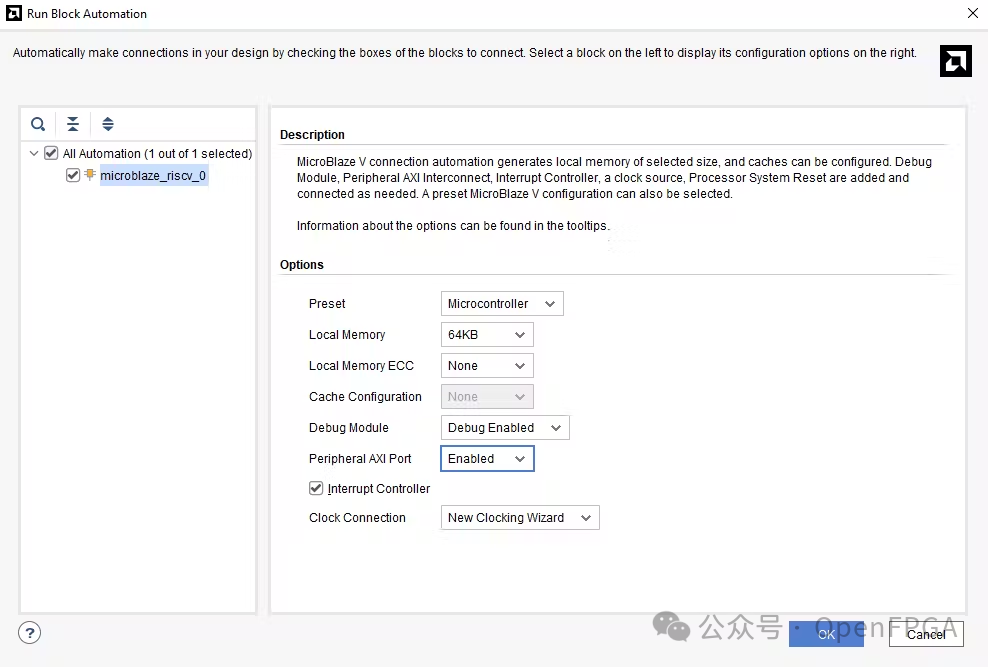
按照下图进行处理器设置:
64 KB Local Memory
. 启用调试模块
. 启用外围 AXI 端口
. 启用新的中断控制器和时钟向导
完成后如下:
下一步是获取 Digilent Vivado 库,然后添加 PWMV2 IP 。
https://github.com/Digilent/vivado-library
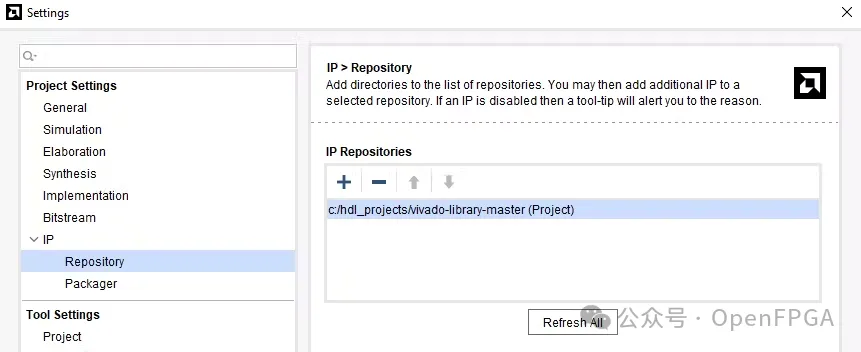
该 IP 非常适合 PWM 生成,并且支持多种 PWM 输出。
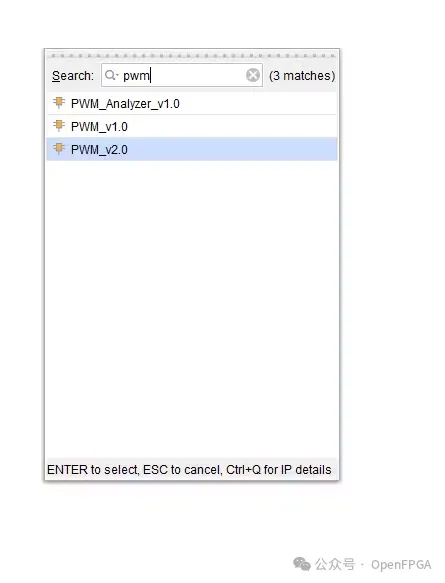
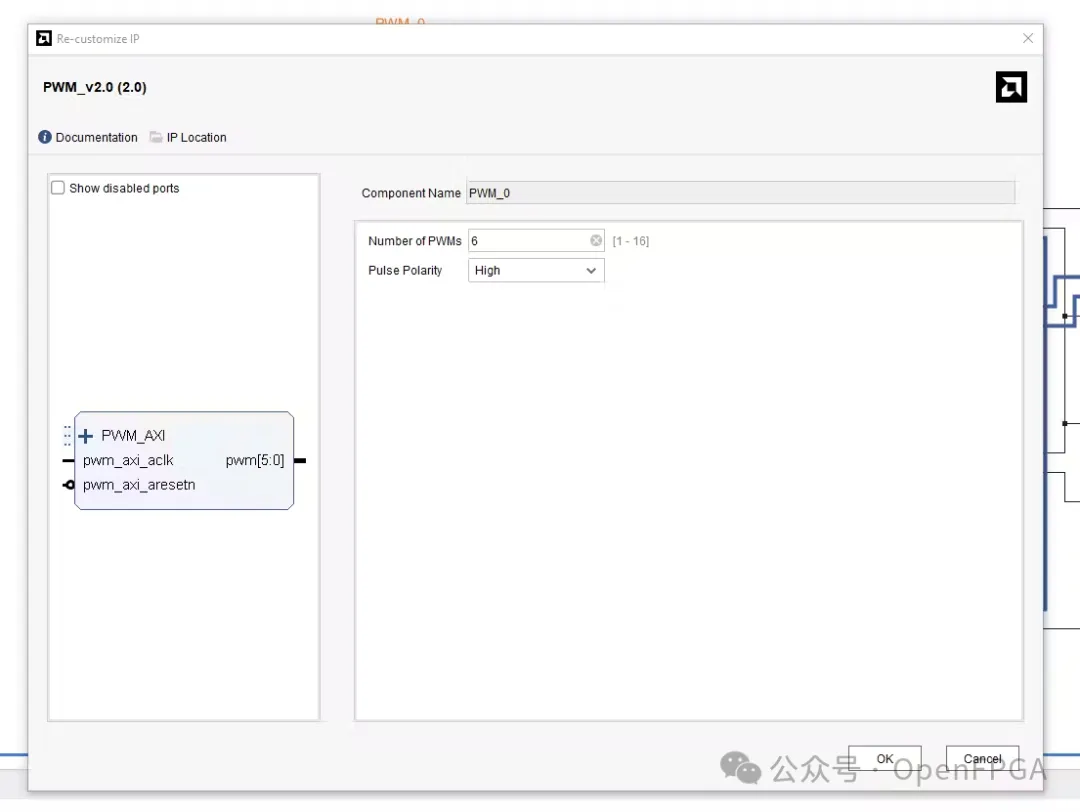
将该IP进行如下设置:
. 六个PWM输出
要添加的倒数第二个 IP 是 AXI UART。

最后需要添加一个设置为逻辑高电平的常量IP来驱动机械臂扩展版上的软启动引脚。

然后按照板卡硬件将时钟引入到系统里即可。
完整的设计如下所示。
然后生成顶层文件和添加约束:
set_property IOSTANDARD LVCMOS33 [get_ports {pwm_0[5]}]
set_property IOSTANDARD LVCMOS33 [get_ports {pwm_0[4]}]
set_property IOSTANDARD LVCMOS33 [get_ports {pwm_0[3]}]
set_property IOSTANDARD LVCMOS33 [get_ports {pwm_0[2]}]
set_property IOSTANDARD LVCMOS33 [get_ports {pwm_0[1]}]
set_property IOSTANDARD LVCMOS33 [get_ports {pwm_0[0]}]
set_property PACKAGE_PIN T11 [get_ports {pwm_0[0]}]
set_property PACKAGE_PIN T14 [get_ports {pwm_0[1]}]
set_property PACKAGE_PIN T15 [get_ports {pwm_0[2]}]
set_property PACKAGE_PIN M16 [get_ports {pwm_0[3]}]
set_property PACKAGE_PIN V17 [get_ports {pwm_0[4]}]
set_property PACKAGE_PIN U18 [get_ports {pwm_0[5]}]
set_property IOSTANDARD LVCMOS33 [get_ports {soft_start[0]}]
set_property PACKAGE_PIN R17 [get_ports {soft_start[0]}]
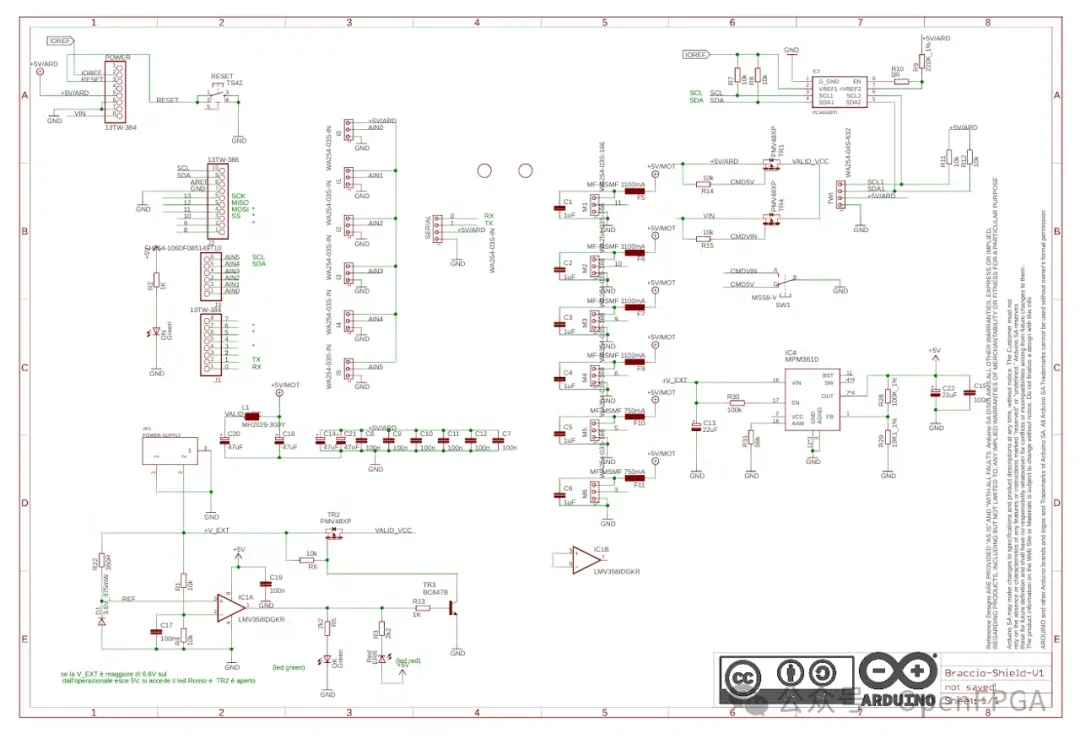
本次设计的扩展板的原理图:
https://store.arduino.cc/products/tinkerkit-braccio-robot?
最后生成bit后导出到Vitis。

AMD Vitis 设计
开发的下一阶段是创建适用于 AMD MicroBlaze V 处理器的应用程序。
首先,创建一个包含 XSA 配置的新平台。
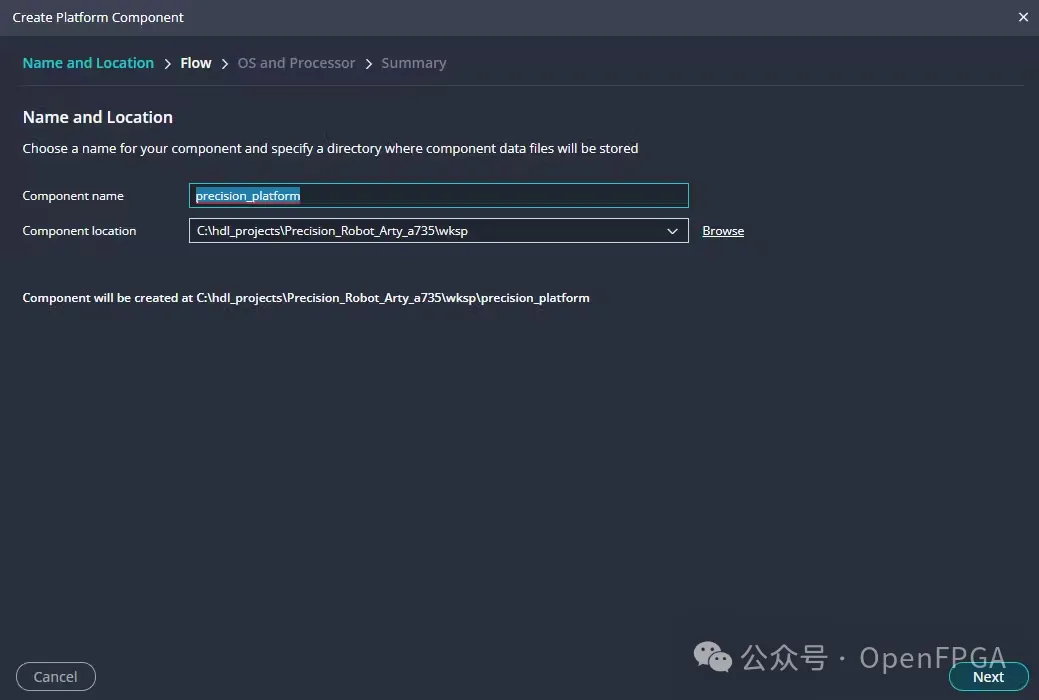
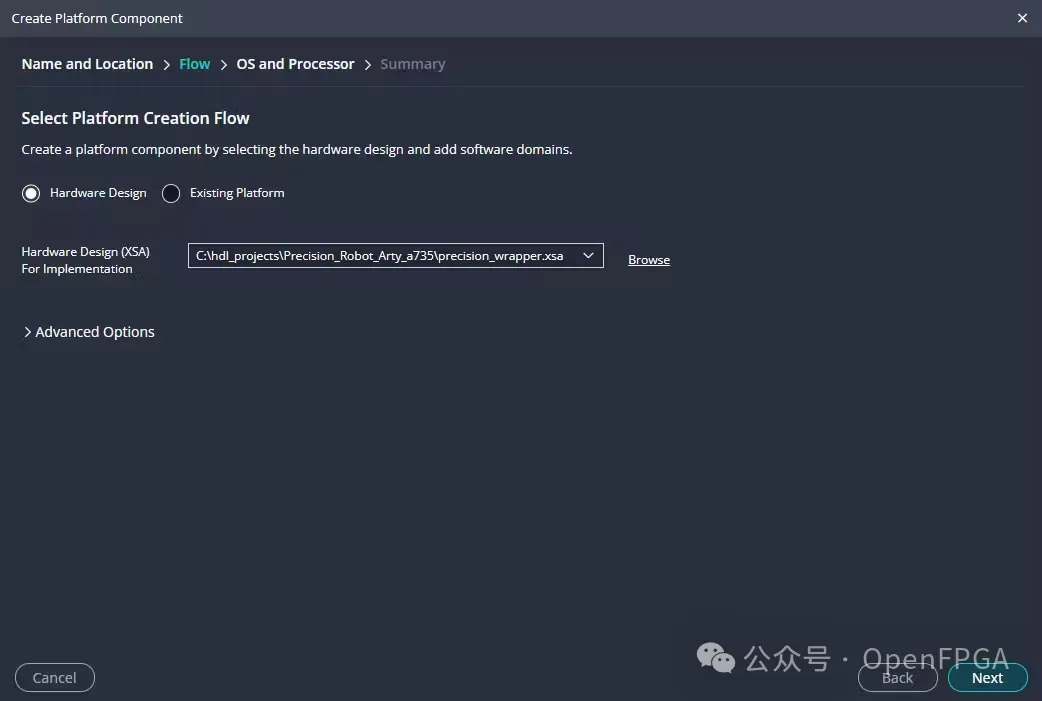
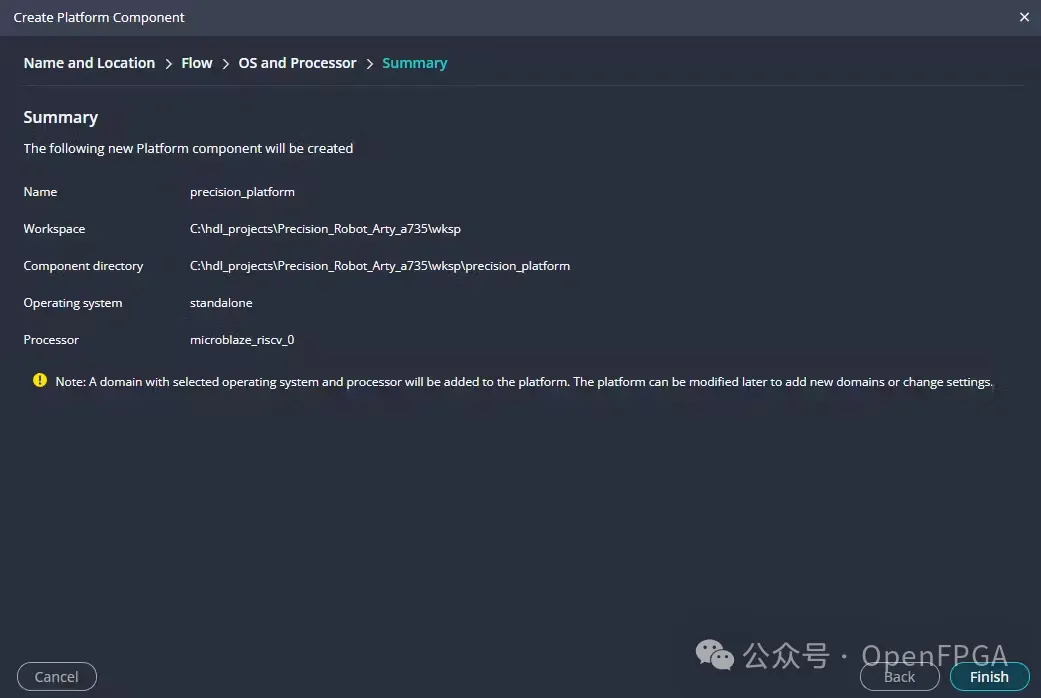
单击“完成”。
创建新的应用程序。
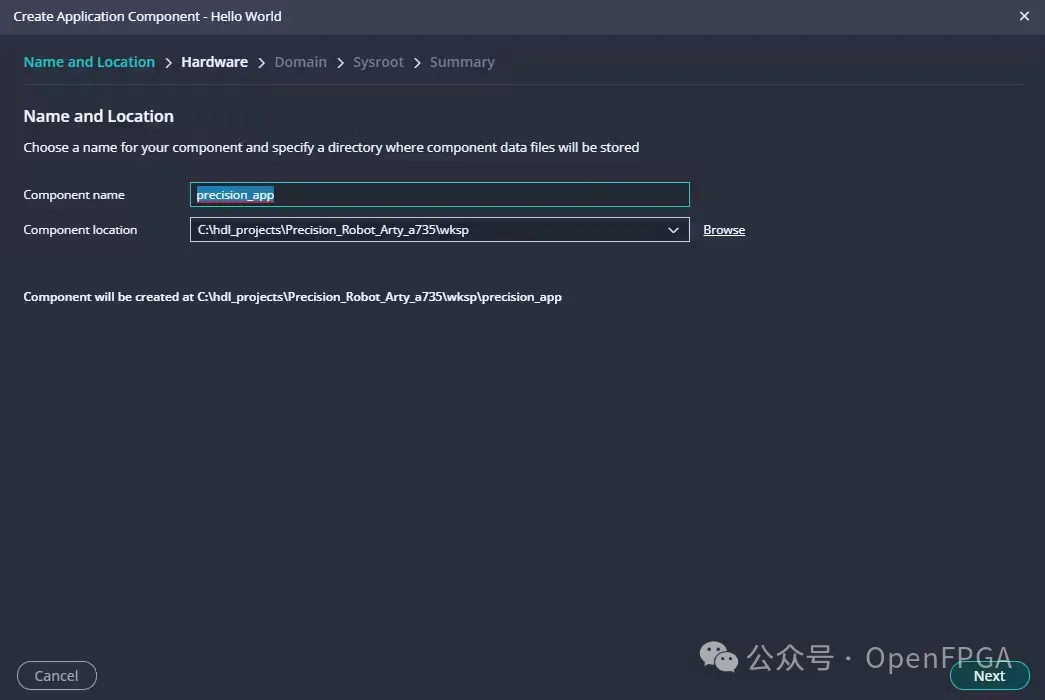
选择我们刚刚创建的平台。
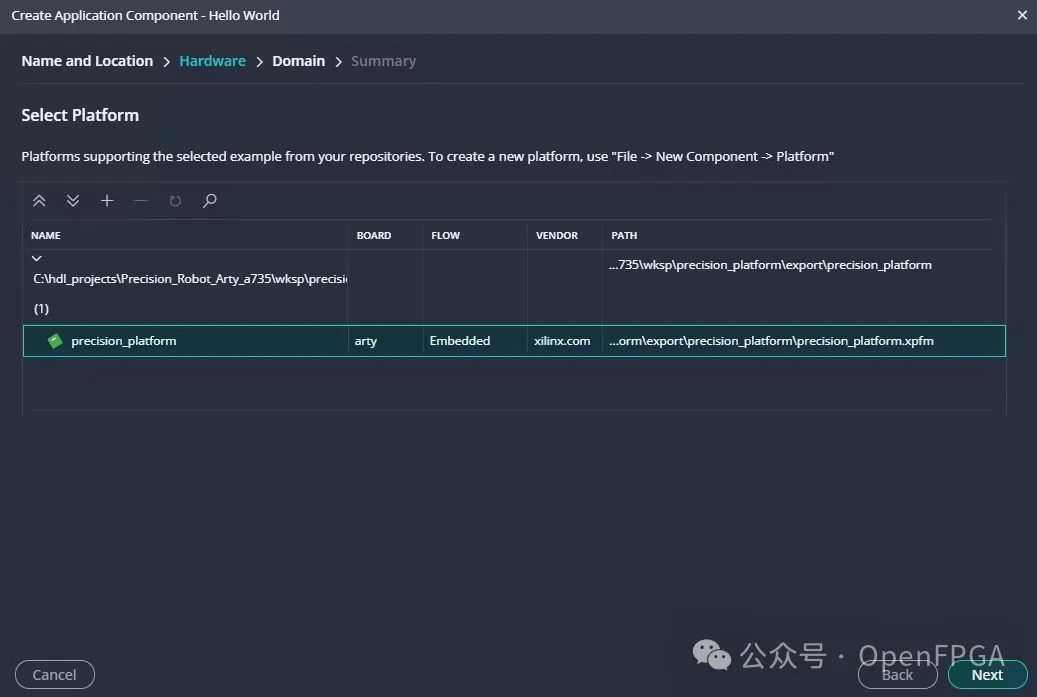
接下来创建文件,这些文件可在最后的开源链接中找到。
文件的描述如下:
. main.c :此文件用作应用程序的入口点。它包含master_include.h并定义两个主要函数:main()和setup_pwm()。main()函数用来初始化平台、设置 PWM 并持续解析用户cli_parse_command()命令。setup_pwm()函数负责将适当的值写入控制和占空比寄存器来配置 PWM 硬件。此文件管理主应用程序流程和硬件交互。
. cli.h:这是命令行界面 (CLI) 功能的头文件。它定义了几个支持 UART 操作和命令解析的函数和常量,例如read_serial()、init_uart0()和cli_parse_command()。它还声明了一些在整个 CLI 系统中使用的全局变量(test_id、、)。该头文件充当接口,用于处理串行通信和命令处理所需的函数
. cli.c :这是cli.h 中声明的 CLI 功能的实现文件。它包括master_include.h并提供初始化 UART(init_uart0())、读取串行命令(read_serial())和解析用户命令(cli_parse_command())的实现。它还包含用于转换数据类型的辅助函数,例如string_to_u8()和char_to_int()。该文件管理用户与系统之间的交互,解释命令并将其转换为相应的操作。
. master_include.h:此头文件充当项目的中心包含点,将各种标准和外部库头文件汇集在一起。它包括诸如stdint.h、stdio.h之类的库以及 Xilinx 特定的头文件(例如xil_types.h、xil_io.h)。它还包括cli.h中 CLI 功能并定义 PWM 寄存器偏移量的常量(PWM_AXI_CTRL_REG_OFFSET、PWM_AXI_PERIOD_REG_OFFSET、PWM_AXI_DUTY_REG_OFFSET)。此文件简化了整个项目中所需库的包含路径,确保所有必要的依赖项都可用。
cli.c 文件中使用的关键函数包括:
将角度转换为伺服驱动持续时间。
// Function to convert angle to PWM value
unsigned int angle_to_pwm(int angle) {
// Clamp angle within valid range
if (angle < ANGLE_MIN) angle = ANGLE_MIN;
if (angle > ANGLE_MAX) angle = ANGLE_MAX;
// Map angle to pulse width in ms
double pulse_width_ms = MIN_PULSE_WIDTH_MS + ((double)(angle - ANGLE_MIN) / (ANGLE _MAX - ANGLE_MIN)) * (MAX_PULSE_WIDTH_MS - MIN_PULSE_WIDTH_MS);
// Convert pulse width in ms to counter value
unsigned int pwm_period = CLOCK_FREQUENCY / PWM_FREQUENCY;
unsigned int pulse_width_counts = (unsigned int)((pulse_width_ms / 1000.0) * CLOCK _FREQUENCY);
return pulse_width_counts;
}
Xil Print Float - 使 XIL_PRINTF 能够打印出浮点数。
void xil_printf_float(float x){
int integer, fraction, abs_frac;
integer = x;
fraction = (x - integer) * 100;
abs_frac = abs(fraction);
xil_printf("%d.%3d\n\r", integer, abs_frac);
}
CLI 循环中的联合处理。
if (strcmp(ptr, "a") == 0)
{
ptr = strtok(NULL, command_delim);
val = char_to_int(strlen(ptr), ptr);
unsigned int pulse_width = angle_to_pwm(val);
Xil_Out32(XPAR_PWM_0_BASEADDR + PWM_AXI_DUTY_REG_OFFSET,pulse_width);
val = Xil_In32( XPAR_PWM_0_BASEADDR + PWM_AXI_DUTY_REG_OFFSET);
xil_printf(" Val: 0x%x (%d)\r\n", val, val);
}
Jupyter 应用程序
机械臂的控制使用 Jupyter lab note book,它通过串口进行通信并实现控制机械臂的大部分功能。
代码设计如下:
import serial # pyserial library
import ipywidgets as widgets
from IPython.display import display, clear_output
import json
import time
# Define the serial port and the baud rate
port = 'COM4' # Replace with your serial port name, e.g., '/dev/ttyUSB0' on Linux
baud_rate = 9600 # Common baud rate
try:
# Open the serial port
#ser = serial.Serial(port, baud_rate, timeout=1)
# Function to send command to the serial port
def send_command(change):
joint = change['owner'].description.split(' ')[1].lower() # Get joint identifier
angle = change['new']
command = f"{joint} {angle}\n\r"
print(f"Message to be sent: {command.strip()}")
ser.write(command.encode('ascii'))
clear_output(wait=True) # Clear previous output to keep it clean
print(f"Sent command: {command.strip()}")
# Function to save the current joint settings to a file
def save_settings():
with open('joint_settings.json', 'a') as file:
for joint, value in sliders.items():
command = f"{joint} {value.value}\n"
file.write(command)
print("Joint settings saved to joint_settings.json")
# Function to execute the settings from the file
def execute_saved_settings():
try:
with open('joint_settings.json', 'r') as file:
for line in file:
joint, angle = line.strip().split()
command = f"{joint} {angle}\n\r"
ser.write(command.encode('ascii'))
sliders[joint].value = int(angle) # Update slider to reflect current position
print(f"Executing command: {command.strip()}")
except FileNotFoundError:
print("No saved settings file found.")
# Function to reset all joints to 90 degrees
def home_position():
for joint, slider in sliders.items():
slider.value = 90
command = f"{joint} 90\n\r"
ser.write(command.encode('ascii'))
print(f"Resetting {joint} to 90 degrees")
print("All joints reset to home position (90 degrees).")
# Function to transition a joint from a start point to an end point
def transition_joint(joint, start, end, step=1, delay=0.05):
if start < end:
for angle in range(start, end + 1, step):
command = f"{joint} {angle}\n\r"
ser.write(command.encode('ascii'))
sliders[joint].value = angle # Update slider to reflect current position
print(f"Transitioning {joint} to {angle} degrees")
time.sleep(delay)
else:
for angle in range(start, end - 1, -step):
command = f"{joint} {angle}\n\r"
ser.write(command.encode('ascii'))
sliders[joint].value = angle # Update slider to reflect current position
print(f"Transitioning {joint} to {angle} degrees")
time.sleep(delay)
# Function to get the current position of all sliders
def get_current_positions():
positions = {joint: slider.value for joint, slider in sliders.items()}
print("Current joint positions:", positions)
return positions
# Function to execute saved settings by transitioning joints
def execute_saved_settings_with_transition():
try:
with open('joint_settings.json', 'r') as file:
for line in file:
joint, target_angle = line.strip().split()
target_angle = int(target_angle)
current_positions = get_current_positions()
start_angle = current_positions[joint]
transition_joint(joint, start_angle, target_angle)
except FileNotFoundError:
print("No saved settings file found.")
# Create sliders for each joint (a to f)
sliders = {}
slider_widgets = []
for joint in ['a', 'b', 'c', 'd', 'e', 'f']:
slider = widgets.IntSlider(value=90, min=0, max=180, step=1, description=f'Joint {joint.upper()}')
slider.observe(send_command, names='value')
sliders[joint] = slider
slider_widgets.append(slider)
sliders_box = widgets.VBox(slider_widgets)
# Button to save the current joint settings
save_button = widgets.Button(description="Save Current Settings")
save_button.on_click(lambda x: save_settings())
display(save_button)
# Button to execute the saved settings
execute_saved_button = widgets.Button(description="Execute Saved Settings")
execute_saved_button.on_click(lambda x: execute_saved_settings())
display(execute_saved_button)
# Button to reset all joints to home position
home_button = widgets.Button(description="Home Position")
home_button.on_click(lambda x: home_position())
display(home_button)
joint_selector = widgets.Dropdown(options=['a', 'b', 'c', 'd', 'e', 'f'], description='Joint:')
start_box = widgets.BoundedIntText(value=0, min=0, max=180, step=1, description='Start:')
end_box = widgets.BoundedIntText(value=180, min=0, max=180, step=1, description='End:')
move_button = widgets.Button(description="Move Joint")
transition_box = widgets.HBox([joint_selector, start_box, end_box, move_button])
# Button to execute saved settings with transition
execute_transition_button = widgets.Button(description="Execute Saved Settings with Transition")
execute_transition_button.on_click(lambda x: execute_saved_settings_with_transition())
display(execute_transition_button)
def on_move_button_click(_):
joint = joint_selector.value
start = start_box.value
end = end_box.value
transition_joint(joint, start, end)
move_button.on_click(on_move_button_click)
# Button to get current positions of sliders
get_positions_button = widgets.Button(description="Get Current Positions")
get_positions_button.on_click(lambda x: get_current_positions())
close_button = widgets.Button(description="Close Serial Port")
close_button.on_click(lambda x: close_serial_port())
display(close_button)
# Arrange buttons in a structured layout
buttons_box = widgets.VBox([
widgets.HBox([save_button, execute_saved_button, execute_transition_button]),
widgets.HBox([home_button, get_positions_button, close_button])
])
# Display all widgets in a structured layout
display(sliders_box, transition_box, buttons_box)
# Close the serial port when done
def close_serial_port():
if ser.is_open:
ser.close()
print("Serial port closed.")
# Create a button to close the serial port
except serial.SerialException as e:
print(f"Error: {e}")
except Exception as e:
print(f"An unexpected error occurred: {e}")
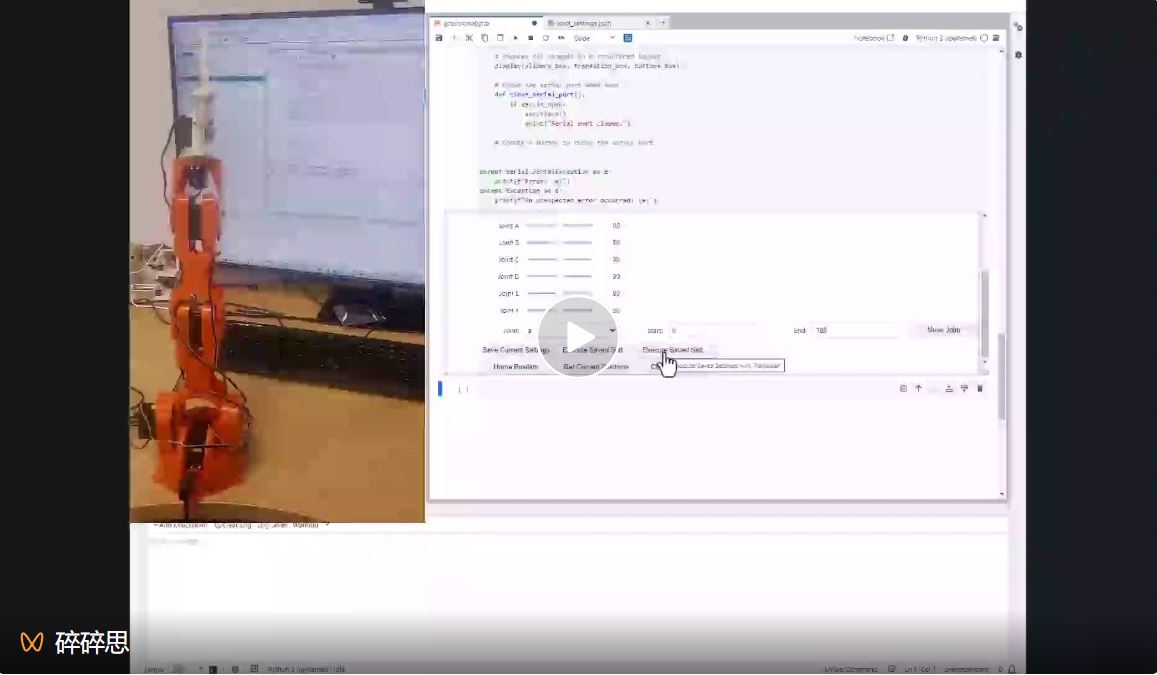
该代码旨在提供一个交互式界面,用于与机械臂进行通信。
为了使 jupyter lab notebook 具有交互性,使用ipywidgets库创建了一系列滑块和按钮,使用户能够调整机器人各个关节的位置、保存、执行特定的关节配置以及在位置之间平稳过渡。
功能的核心是使用 PySerial() 库,通过串口与 AMD MicroBlaze V 建立通信。这样可以根据 jupyter lab notebook 中的交互将命令直接传输到机械臂。
使用交互式小部件可以轻松实时可视化和调整机器人的状态,从而简化控制复杂多关节运动的过程。这些位置指示器会在应用程序运行时更新,显示手臂关节的当前位置。

每个关节都由一个滑块小部件表示,滑块小部件可以设置为 0 到 180 度之间的值。每当用户更改滑块的值时,相应的关节就会通过串口向 AMD MicroBlaze V 发送命令立即更新。
为了使手臂能够替换序列,提供了按钮来将当前关节配置保存到文件中。
这使得用户能够将手臂移动到某个位置并存储该位置,然后将其移动到下一个位置并再次存储下一个位置。就像走走停停的动画一样,这使机械臂建立一个移动序列。命令存储在一个简单的 json 文件中。
然后可以使用执行已保存的序列按钮执行该已保存的序列。
为了确保运动平稳而不生涩,提供了一个 Python 函数,即平滑过渡功能。
该功能通过一个函数实现,该函数以小步骤迭代改变关节值,并在其间稍微延迟地发送增量命令。
为了确保流畅和用户友好的体验,代码还包括安全关闭串口和显示所有关节当前位置的功能。
总结
本次项目展示了如何创建 CLI 来控制机械臂的 PWM 驱动器。还创建了一个详细的 Python 应用程序,该应用程序与 AMD MicroBlaze™ V 配合使用,后续还可以创建更有趣的机器人应用程序。所以本次项目非常适合学习机器人开发、 FPGA 和嵌入式系统开发。
完成的项目链接如下:https://github.com/ATaylorCEngFIET/Arty_a7_precision