作者:沈月红,本文转载自: Ingdan FPGA微信公众号
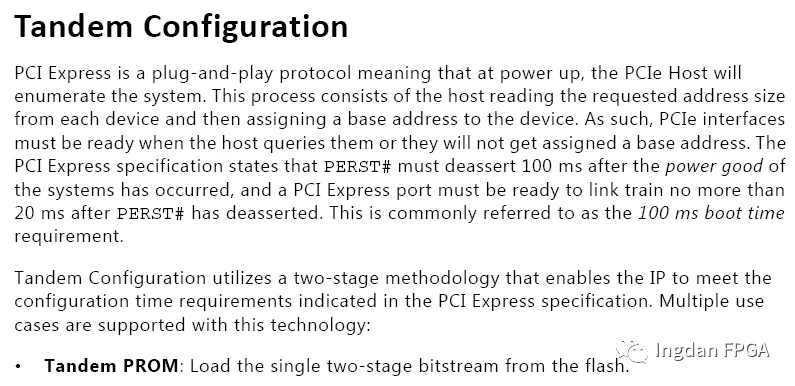
根据PCIE规范对设备的要求是PERST# must deassert 100 ms after the power good of the systems has occurred, and a PCI Express port must be ready to link train no more than 20 ms after PERST# has deasserted.
现在大规模FPGA的bitstream比较大导致板卡从上电到FPGA配置完成的时间远远超过100MS的要求,从而电脑端无法正常识别到PCIE设备。
为此Xilinx的PCIE Tandem(详见PG156)功能是专为满足PCIe设备在100ms之内枚举起来要求而设计的。
Zynq UltraScale+ MPSoC是Xilinx推出的第二代多处理SoC系统,其PL提供高性能的PCIE GEN3 IP core给客户使用。
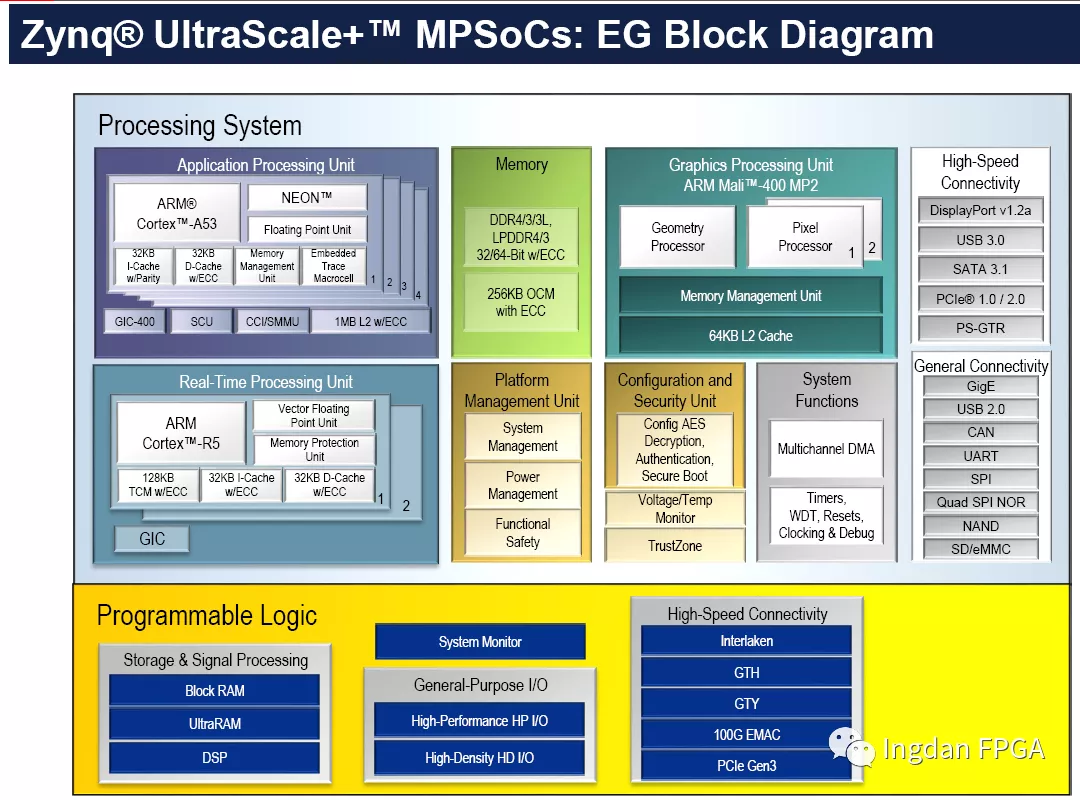
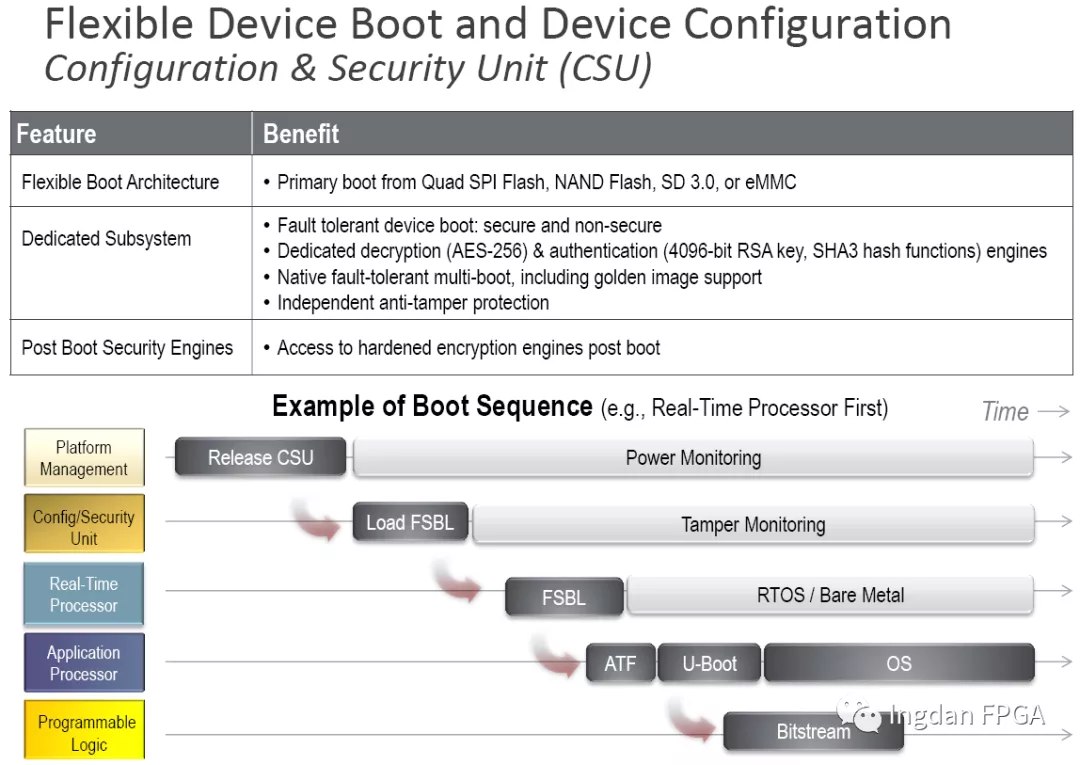
如下图所示,由于MPSOC的启动加载image方式是跟纯FPGA器件是有所差异,MPSOC器件是需要从PS部分先去加载bootrom里面内容,然后按顺序去加载FSBL\Bitstream等等内容。
从上图看来MPSOC加载是比纯FPGA器件复杂很多同时差异也比较大,所以本文主要是介绍如何在MPSOC的器件里面实现PL PCIE tandem的加载方式来满足PCIE规范里面对设备100ms的加载时间要求。
此设计流程是James Shen基于Xilinx AE Iris Yang提供的方法上面完善设计并进行板卡验证。
详细操作步骤请按照下面流程来进行:
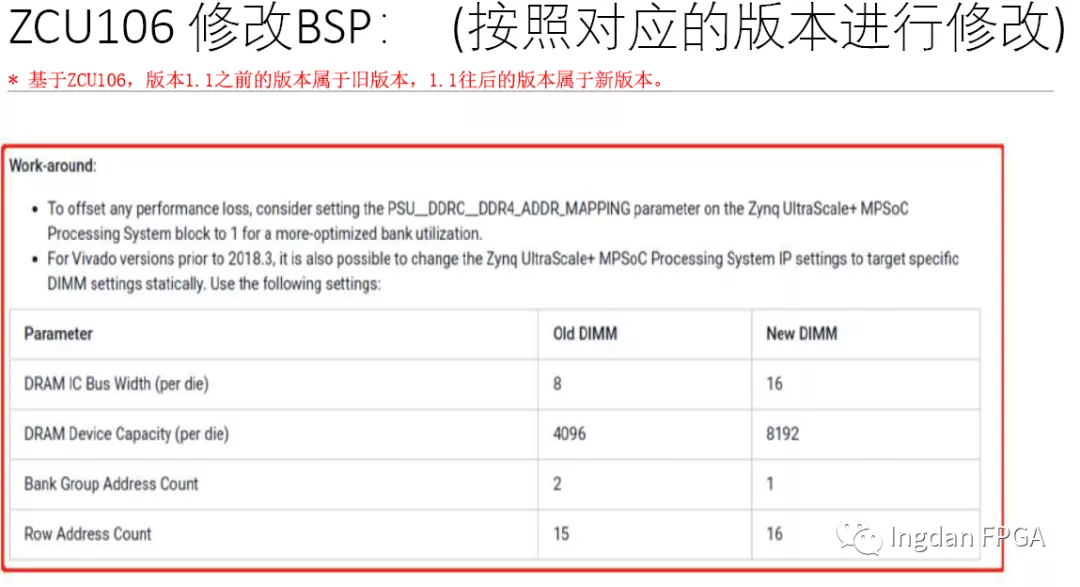
1、测试环境为ZCU106 V1.1板卡和Vivado 2019.1软件;
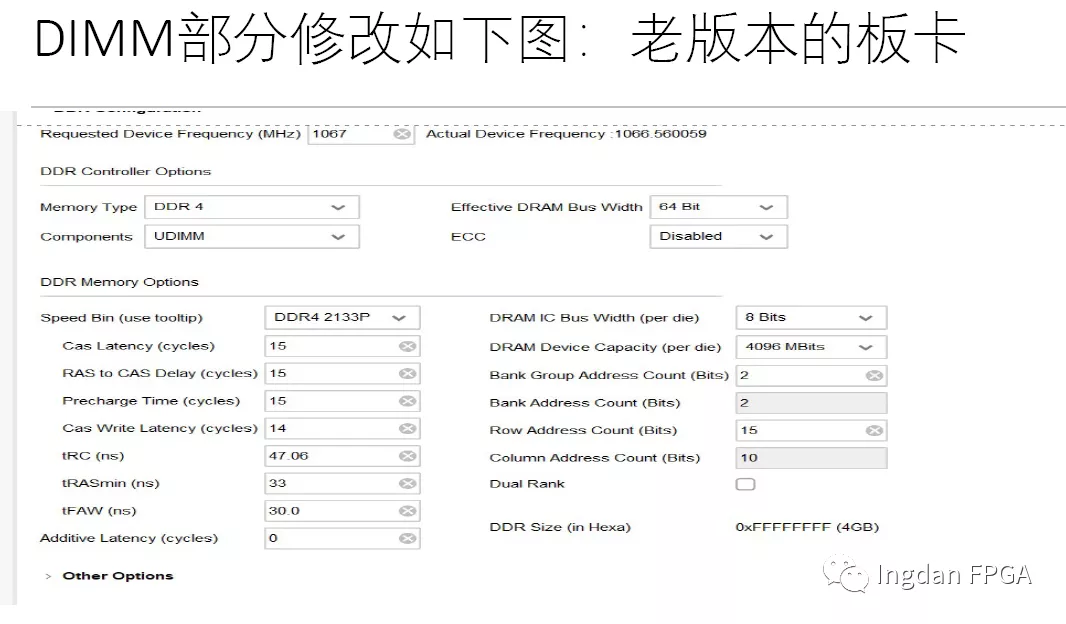
2、由于ZCU106的PS DDR4 DIMM中间换过,所以新的DIMM需要按照下面参数来进行修正,不然系统会无法启动;

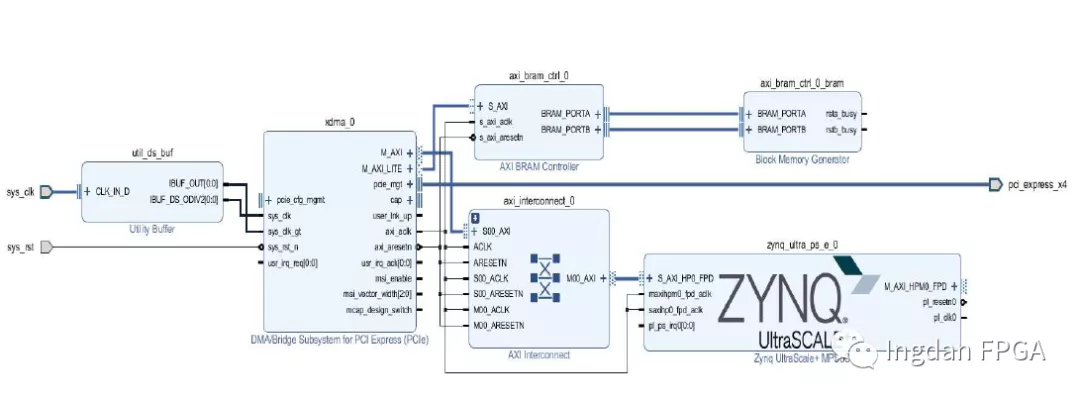
3、在PL里面搭建PCIE XDMA架构;
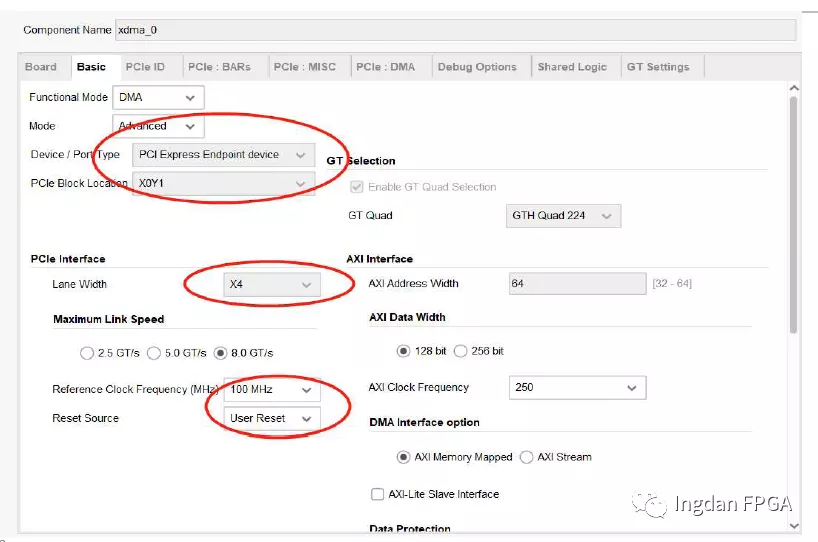
4、根据ZCU106板卡硬件做XDMA配置;

5、根据Xilinx的PCIE example design修改XDC约束;

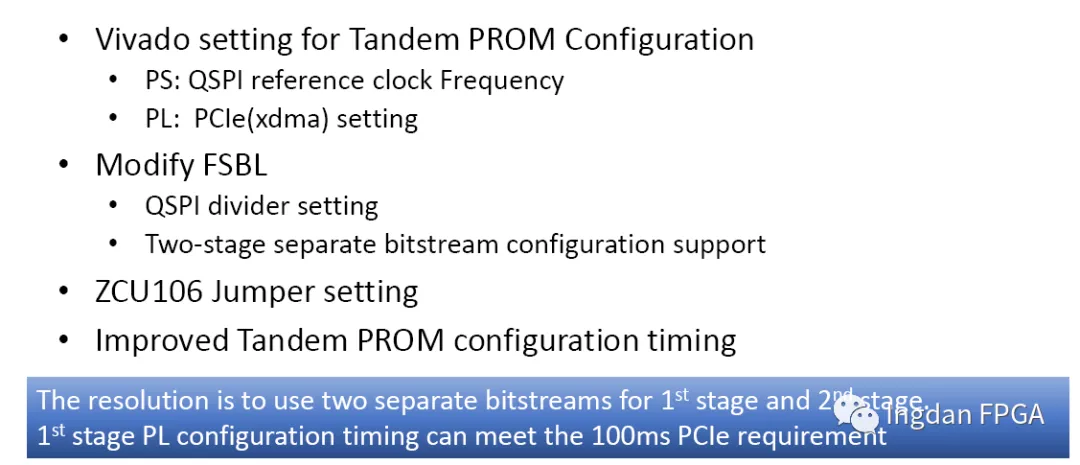
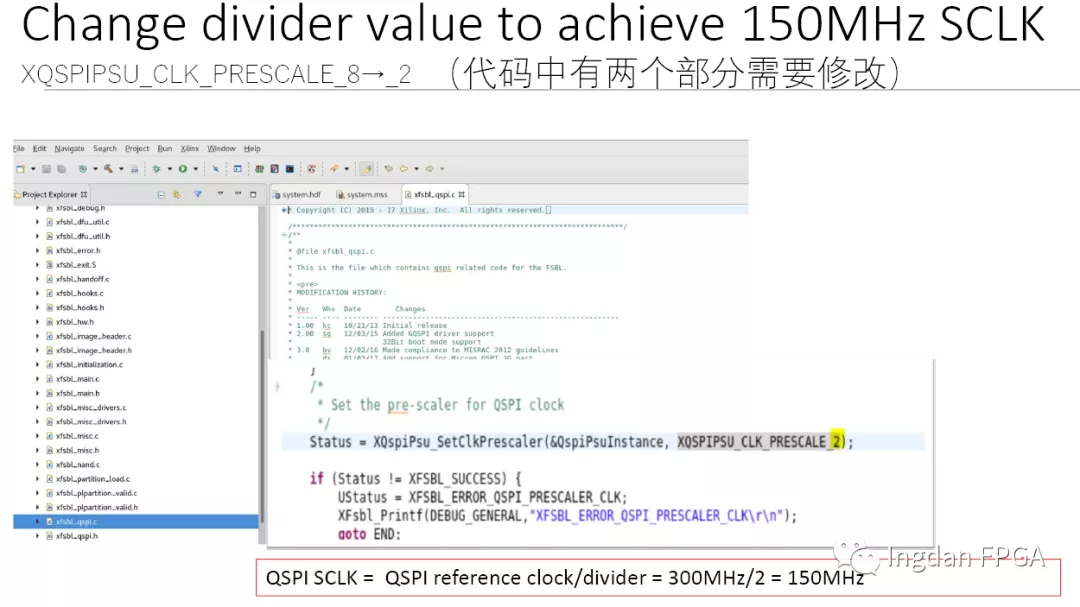
6、把ZCU106的QSPI配置同时提高时钟频率到300MHZ;


7、在XDMA界面设置Tandem PROM;

8、设置XDC里面相关约束文件;

9、修改xfsbl_qspi.c里面时钟计算相关值;
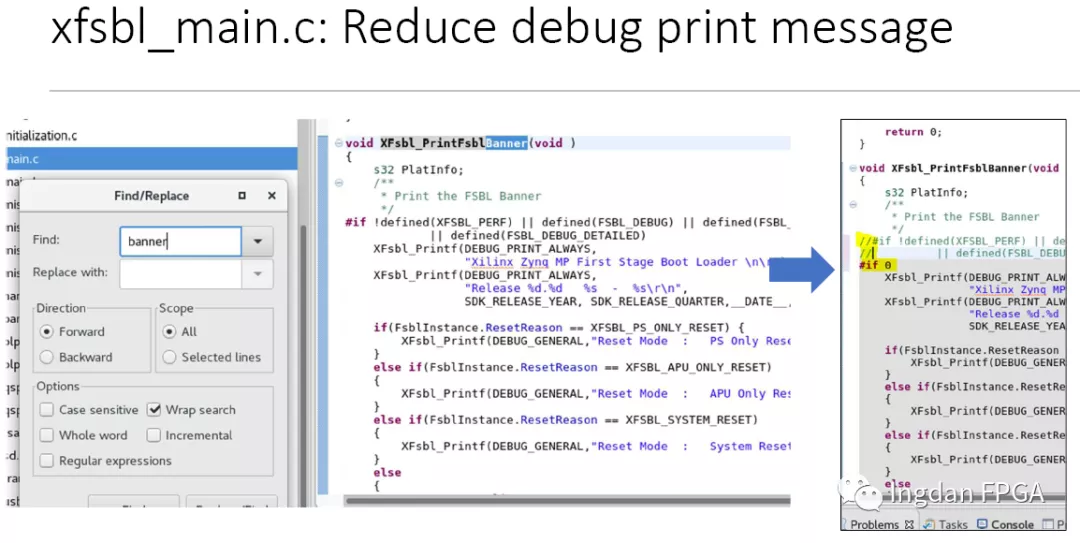
10、去掉打印Debug等信息,从而节约加载时间;
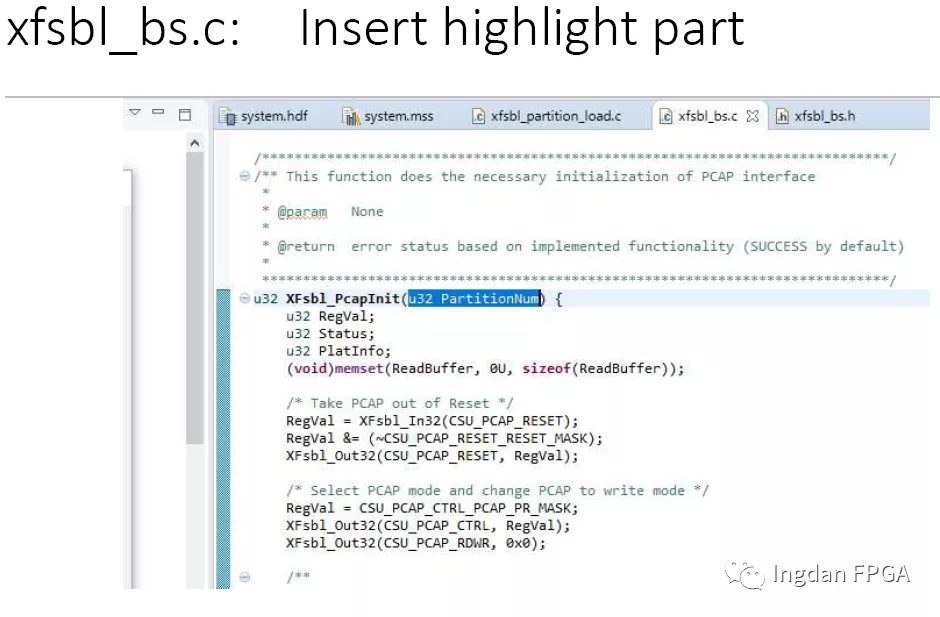
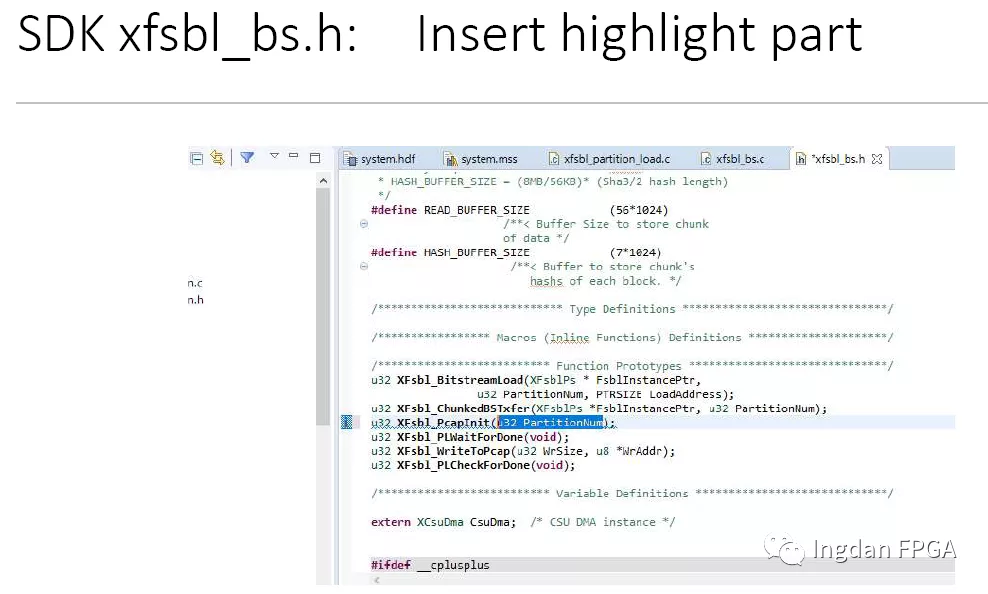
11、修改xfsbl_partition_load.c来支持加载两个阶段的bitstream文件;


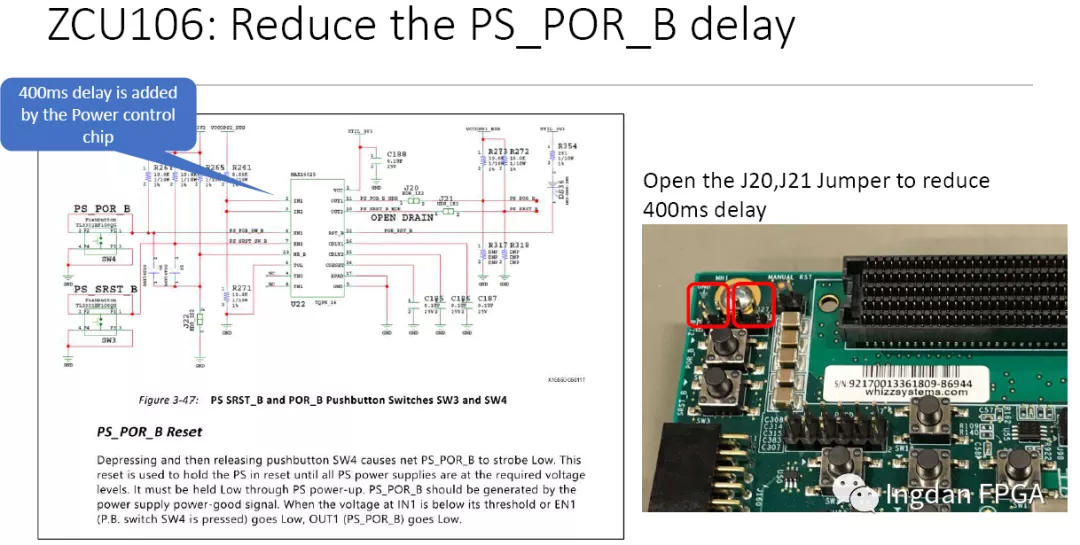
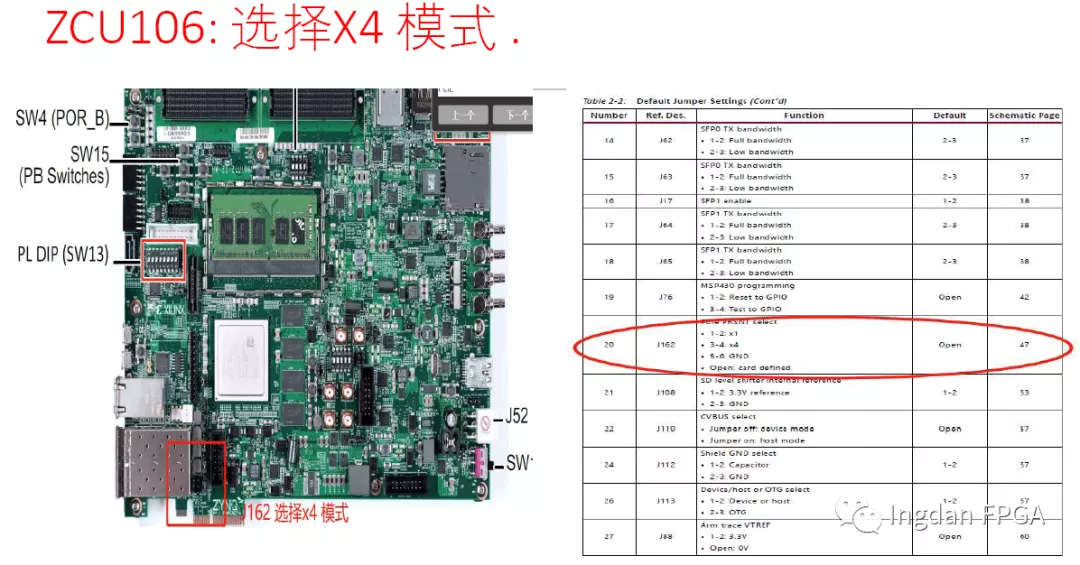
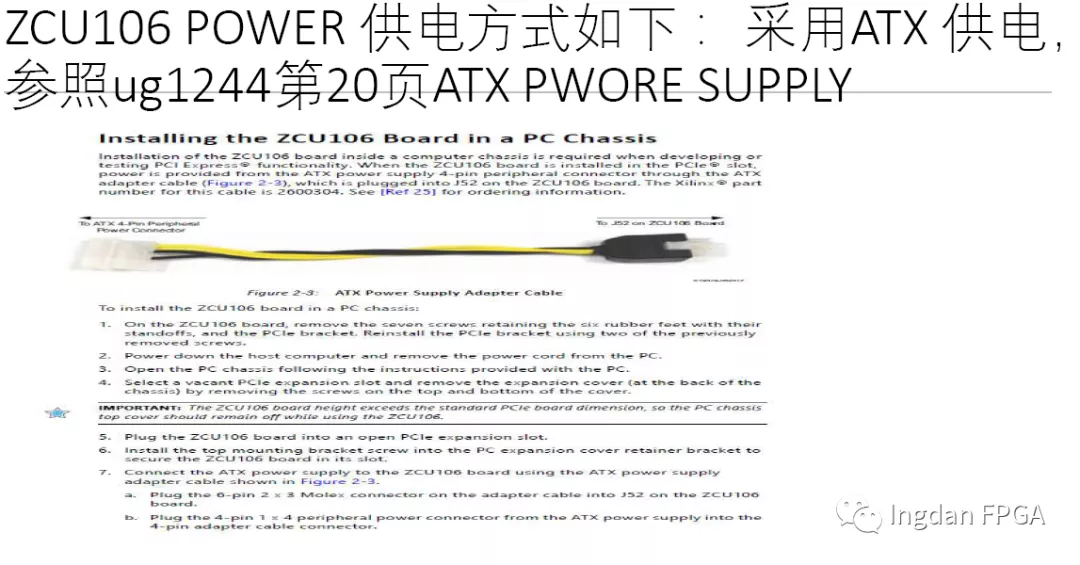
12、对ZCU106的硬件需要进行设置;
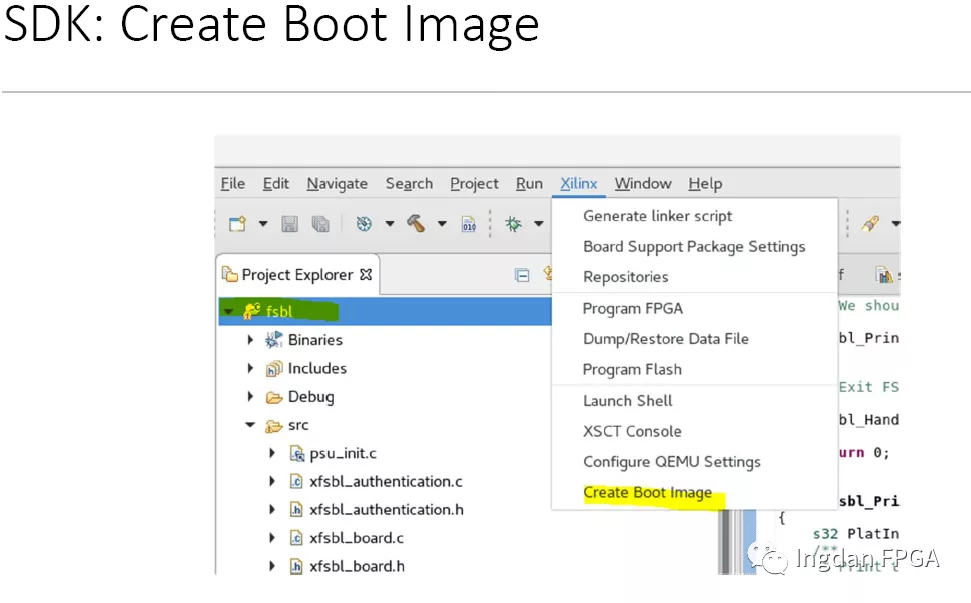
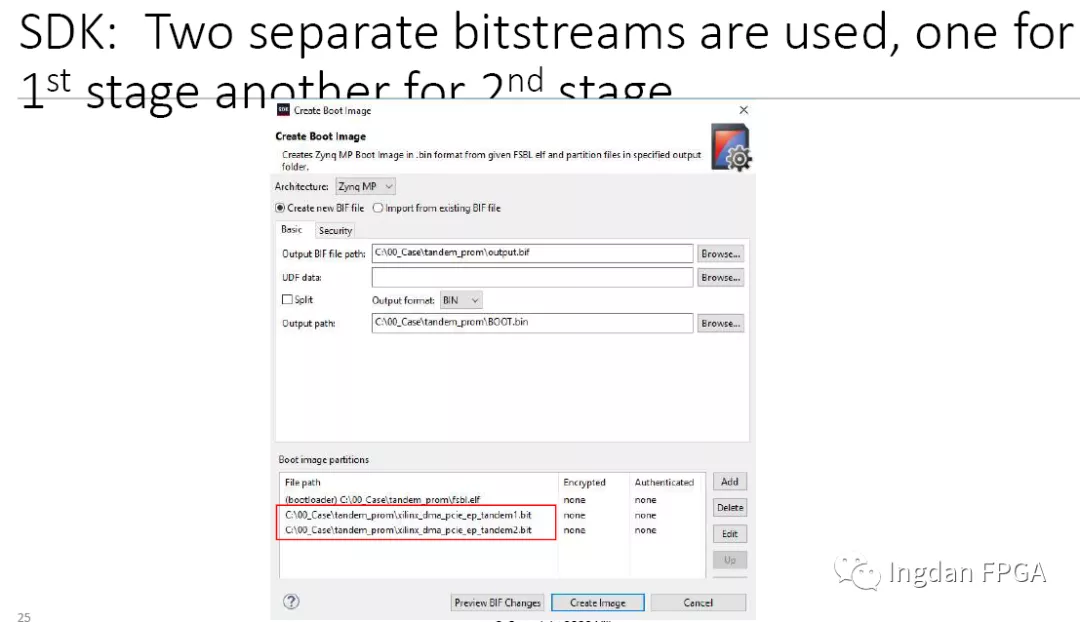
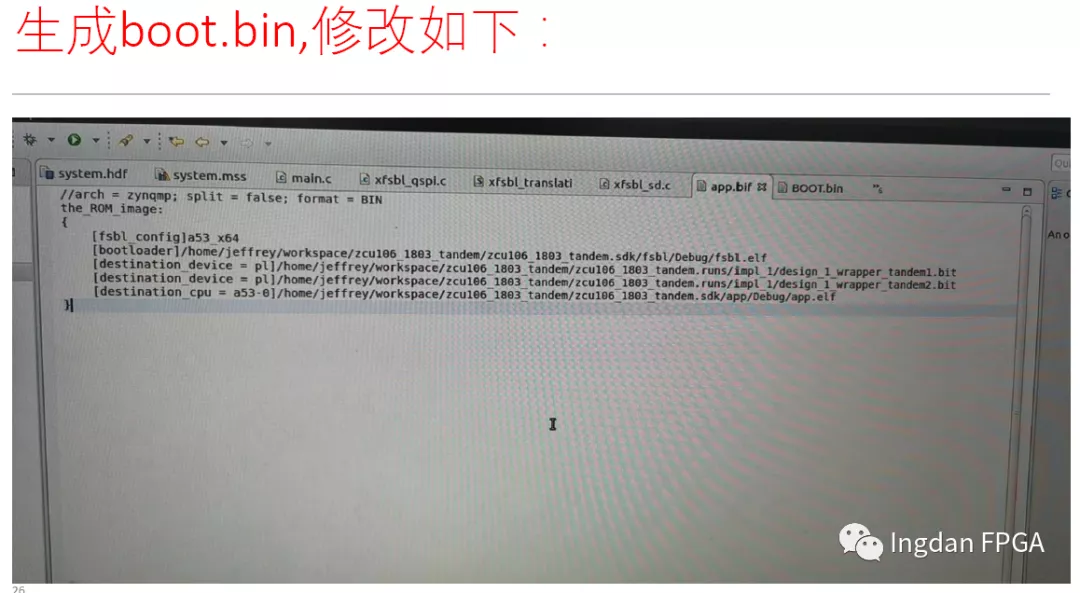
13、生成相关boot image;
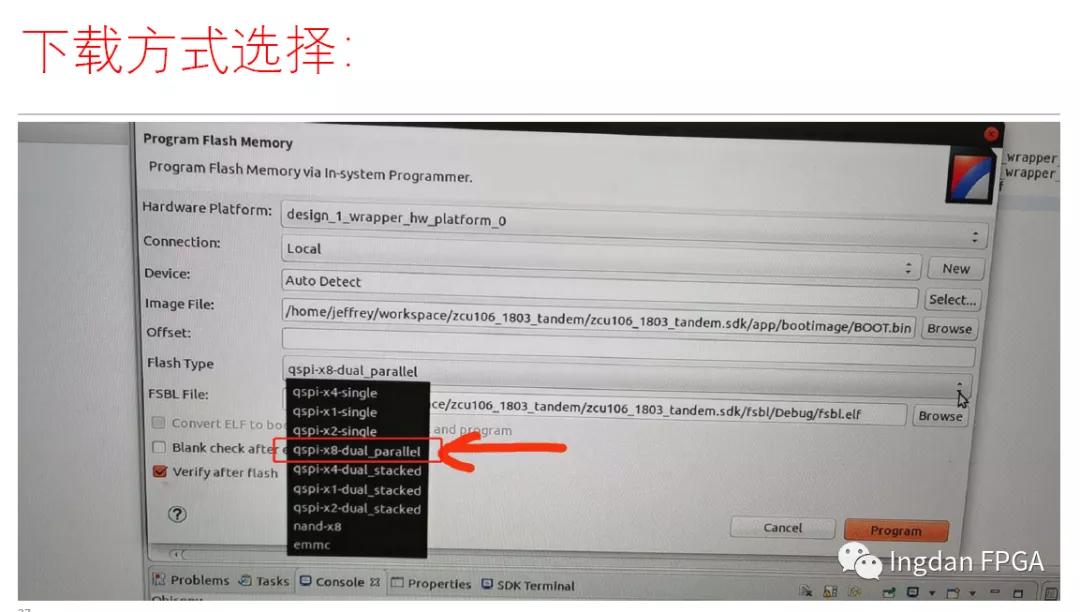
14、根据ZCU106板卡硬件选择下载方式去下载bit到板卡上面就实现本文目的。
根据上文的流程和要求,经过硬件板卡实际验证可以满足PCIE在100ms之内枚举的要求。供大家参考。
如果您有此类问题需要讨论或者需要实际工程验证,请联系我们: