作者:Shaoyi Chen,AMD开发工程师
测试环境

简介
VCK5000在vitis ai 3.0对应的shell版本为xilinx-vck5000-gen4x8-qdma-base_2,对应的XRT和XRM版本为xrt_202220.2.14.354和xrm_202220.1.5.212。旧版本的VCK5000需要首先升级到新的shell上,才能保证vitsi ai的demo正常运行。在平台更新中存在一些需要遵守的规则,例如xilinx_vck5000_gen3x16_xdma_base_1不能直接升级到最新版本,需要首先升级到vck5000_gen4x8_xdma_base_2。On the fly quantization是Vitis AI 3.0新添加的特性,可以执行训练后量化 (PTQ) 以从浮点模型获取量化模型。
Part1 VCK5000升级
Step 1 使用以下命令检查当前板卡的状态
xbmgmt examine --report platform --device
输出示例:
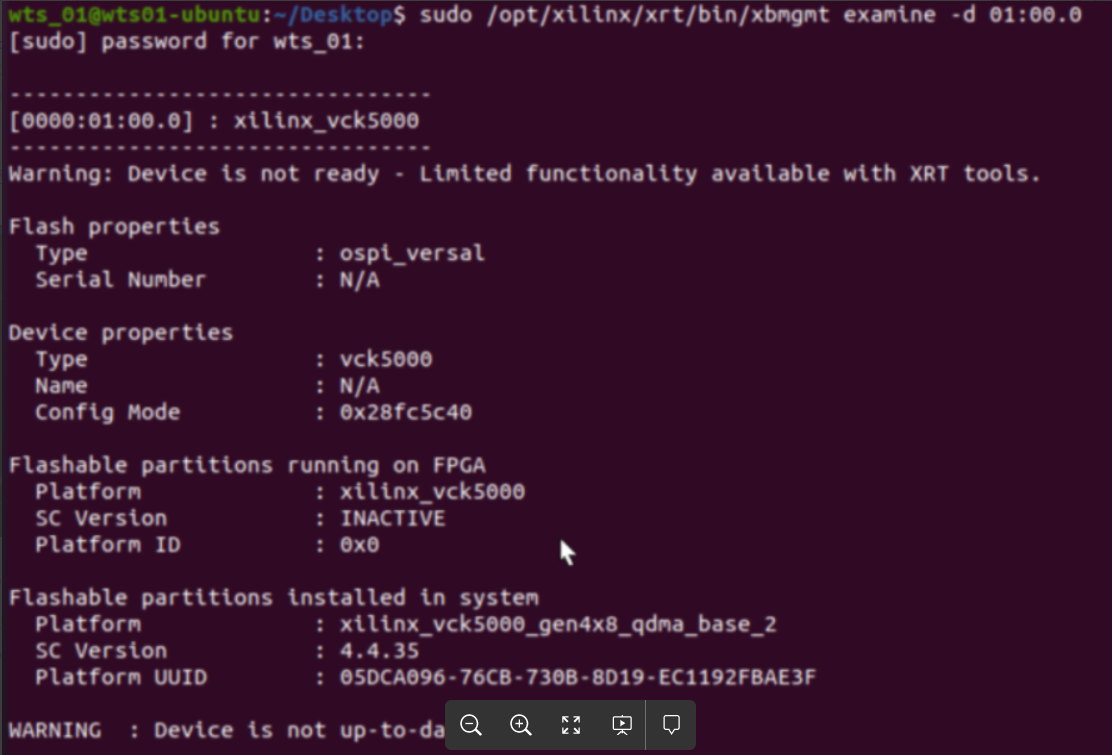
如果Flash properties: Type is ospi_versal一定需要更新到ospi_xgq。
只要板卡能被Vivado识别,可以通过下载比特流恢复到这个状态,恢复的方法为:
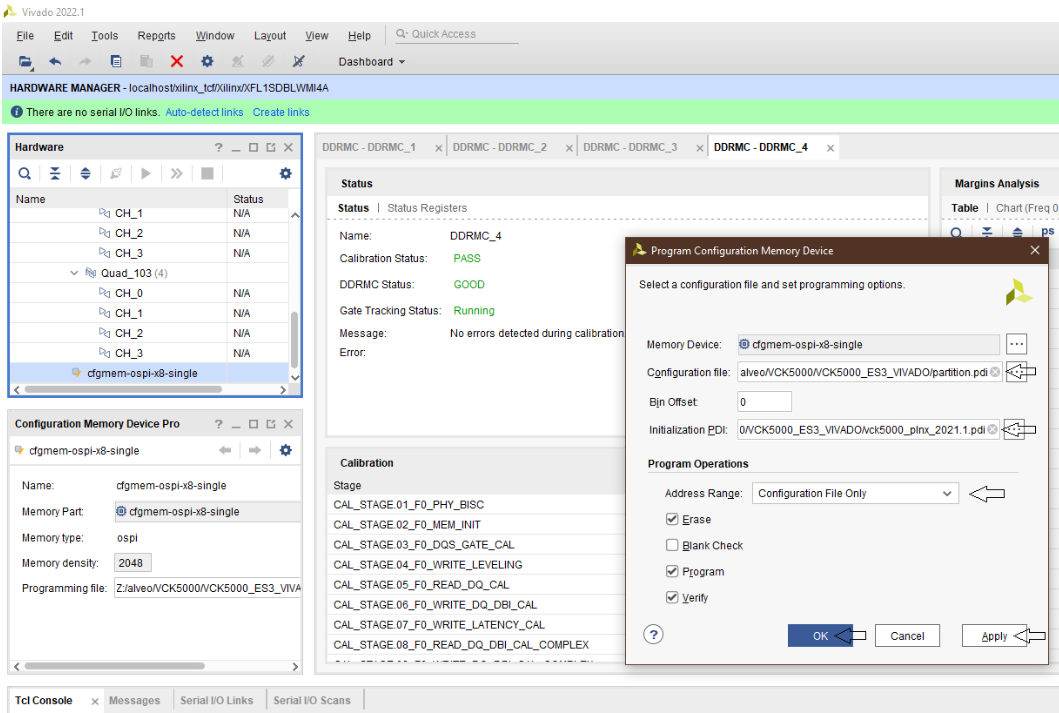

确认勾选了Erase, Program, and Verify。点击Apply, 然后点击OK。等待烧录完毕即可回到初始状态。
Step 2 卸载已安装的XRT
vck5000_gen4x8_xdma_base_2指定的XRT版本为xrt_202210.2.13.478_18.04-amd64-xrt.deb。如果和这个XRT版本不符,先卸载XRT。
Remove XRT : 'sudo apt remove xrt'
Remove XRT APU if present : 'sudo apt remove xrt-apu'
安装所需的XRT
Install XRT 2.13.478 : https://www.xilinx.com/bin/public/openDownload?filename=xrt_202210.2.13....
Install XRT-APU: https://www.xilinx.com/bin/public/openDownload?filename=xrt-apu_202210.2...
安装Gen3和Gen4XDMA平台
Install the gen3x16 platform : https://www.xilinx.com/bin/public/openDownload?filename=xilinx-vck5000-p...
AND install the gen4x8_xdma platform: https://www.xilinx.com/bin/public/openDownload?filename=xilinx-vck5000-g...
Step 3 更新到xilinx_vck5000_gen3x16_xdma_base_1
将Gen3的镜像烧录到板卡中 完成后等待一分钟后冷启动电脑。 Step 4 更新到vck5000_gen4x8_xdma_base_2 根据链接可以将VCK5000的platform从vck5000_gen3x16_base_1更新到vck5000_gen4x8_xdma_base_2。 完成后等待一分钟后冷启动电脑。 Step 5 更新到vck5000_gen4x8_qdma_base_2 下一步需要更新到vck5000_gen4x8_qdma_base_2,首先安装对应版本的XRT,XRM和XRT-APU,然后烧写platform,注意安装版本要和vitis-ai 3.0匹配。 安装XRT 安装XRM 安装vck5000_gen4X8_qdma平台 wget tar xfz shell.tgz 第一步,只能更新shell。 升级完成后等待一分钟冷启动,由于没有更新SC会出现
sudo xbmgmt program --base --device
https://xilinx.github.io/Alveo-Versal-Platforms/alveoversalplatforms/bui...
sudo /opt/xilinx/firmware/vck5000/gen4x8-xdma/base/migration/migrate.sh
https://www.xilinx.com/bin/public/openDownload?filename=xrt_202220.2.14....
https://www.xilinx.com/bin/public/openDownload?filename=xrm_202220.1.5.2...
https://www.xilinx.com/bin/public/openDownload?filename=xilinx-vck5000-g...
sudo apt install ./xilinx-vck5000-gen4x8-qdma-base_2-20221205_all.deb -y
sudo /opt/xilinx/xrt/bin/xbmgmt program --device 01:00.0 --base shell --image xilinx_vck5000_gen4x8_qdma_base_2
将SC版本从4.4.33更新到4.4.35 需要更新两次。第一次更新SC会以失败告终。

等待一分钟后再次烧录SC

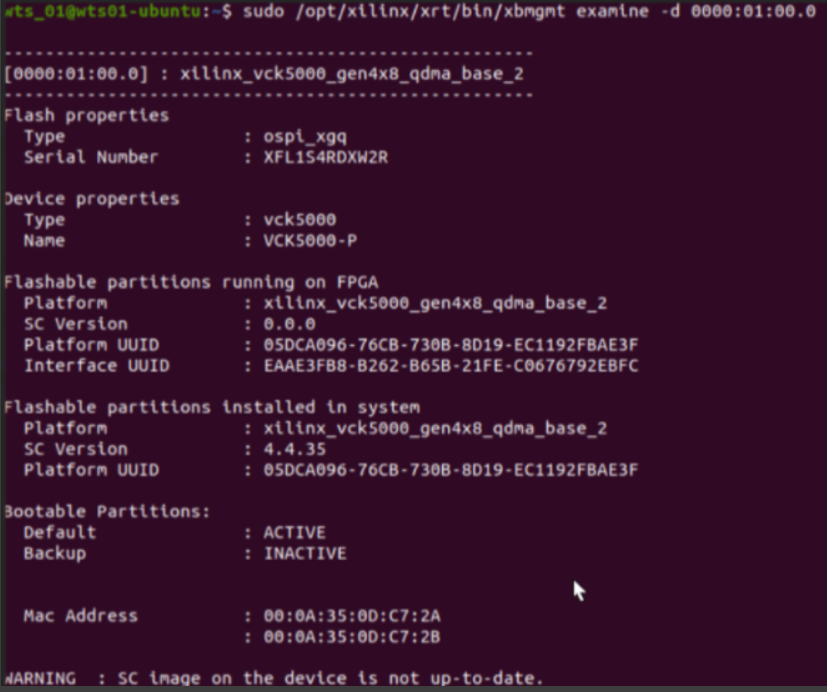
再等待一分钟后冷启动电脑,然后检查板卡状态。
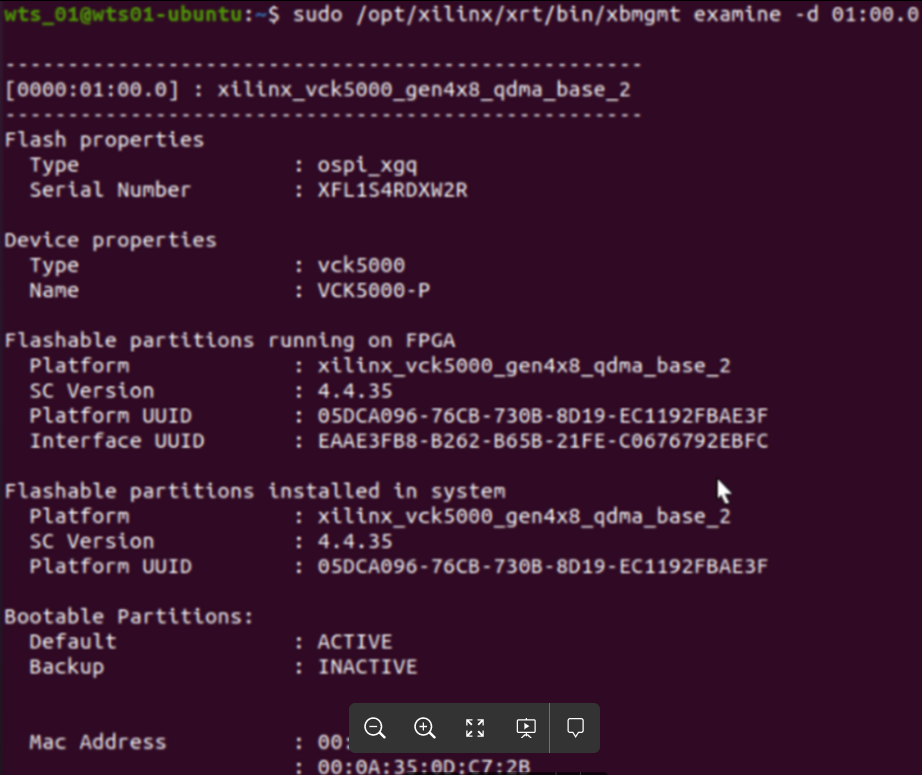
到此更新完毕。
Part2 运行Vitis-AI 3.0 demo
获取Vitis-AI仓库。
git clone
以Pytorch为例子,获取docker容器。
docker pull xilinx/vitis-ai-pytorch-cpu:latest
查询系统中存在的容器
docker images

启动容器。

根据DPU型号设置vck5000脚本,脚本在setup_board/vck5000目录下
source ./setup.sh DPUCVDX8H_4pe_miscdwc
source ./setup.sh DPUCVDX8H_6pe_dwc
source ./setup.sh DPUCVDX8H_6PE_MISC
source ./setup.sh DPUCVDX8H_8pe_normal
该脚本会设置两个环境变量
XCLBIN_PATH = /opt/xilinx/overlaybins/DPUCVDX8H/4PE
XLNX_VART_FIRMWARE = /opt/xilinx/overlaybins/DPUCVDX8H/4PE/dpu_DPUCVDX8H_4PE_350M_xilinx_vck5000_ge
准备数据集
To use ImageNet, first download it from http://www.image-net.org/. For calibration purpose, only the validation set is needed.
数据集结构
# imagenet/train/
# ├── n01440764
# │ ├── n01440764_10026.JPEG
# │ ├── n01440764_10027.JPEG
# │ ├── ......
# imagenet/val/
# ├── n01440764
# │ ├── ILSVRC2012_val_00000293.JPEG
# │ ├── ILSVRC2012_val_00002138.JPEG
# │ ├── ......
# ├── ......
安装必要的包
pip install -r requirements.txt
准备浮点模型
wget
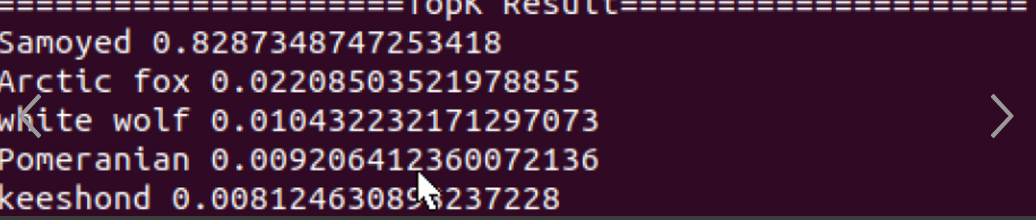
准备测试图像 tar xf wego_example_recipes.tar.gz -C /tmp 运行脚本 可以得到最终的结果
wget -O wego_example_recipes.tar.gz
bash quantize_compile_serialize_run.sh ./inception_v3_google-0cc3c7bd.pth ./val
常见错误
1.运行
bash quantize_compile_serialize_run.sh ./inception_v3_google-0cc3c7bd.pth ./testval/
出现错误
Traceback (most recent call last):
File "run.py", line 181, in
main()
File "run.py", line 166, in main
wego_mod = get_wego_mod(img_transforms)
File "run.py", line 125, in get_wego_mod
quantized_model = wego_torch.quantize(float_model, [[target_batch] + input_shape], calib_dataloader, calibrator)
File "/opt/vitis_ai/conda/envs/vitis-ai-wego-torch/lib/python3.7/site-packages/wego_torch/quantizer.py", line 130, in quantize
for b_idx, batch in tqdm(enumerate(dataloader), total=len(dataloader)):
File "/opt/vitis_ai/conda/envs/vitis-ai-wego-torch/lib/python3.7/site-packages/tqdm/std.py", line 1195, in __iter__
for obj in iterable:
File "/opt/vitis_ai/conda/envs/vitis-ai-wego-torch/lib/python3.7/site-packages/torch/utils/data/dataloader.py", line 681, in __next__
data = self._next_data()
File "/opt/vitis_ai/conda/envs/vitis-ai-wego-torch/lib/python3.7/site-packages/torch/utils/data/dataloader.py", line 721, in _next_data
data = self._dataset_fetcher.fetch(index) # may raise StopIteration
File "/opt/vitis_ai/conda/envs/vitis-ai-wego-torch/lib/python3.7/site-packages/torch/utils/data/_utils/fetch.py", line 49, in fetch
data = [self.dataset[idx] for idx in possibly_batched_index]
File "/opt/vitis_ai/conda/envs/vitis-ai-wego-torch/lib/python3.7/site-packages/torch/utils/data/_utils/fetch.py", line 49, in
File "/opt/vitis_ai/conda/envs/vitis-ai-wego-torch/lib/python3.7/site-packages/torch/utils/data/dataset.py", line 290, in __getitem__
return self.dataset[self.indices[idx]]
File "/opt/vitis_ai/conda/envs/vitis-ai-wego-torch/lib/python3.7/site-packages/torchvision/datasets/folder.py", line 229, in __getitem__
path, target = self.samples[index]
IndexError: list index out of range
请往数据集添加更多的测试数据。
2.更新VCK5000到xilinx_vck5000_gen4x8_xdma_base_2出错
EXE: /opt/xilinx/xrt/bin/unwrapped/xbmgmt2
[xbmgmt] ERROR: Failded to update base: Invalid argument
参考链接:
https://support.xilinx.com/s/article/XRT-Xilinx-Runtime-version-2021-2-2...
https://xilinx.github.io/Alveo-Versal-Platforms/alveoversalplatforms/bui...
https://github.com/Xilinx/Vitis-AI/tree/master/examples/wego
https://xilinx.github.io/Vitis-AI/docs/install/install.html
https://www.xilinx.com/member/vck5000.html#vitis