前言:
使用的板子是zc702。用Vivado的IP核搭建最小系统,包括ARM核(CPU xc7z020),DDR3(4×256M),一个UART串口(Mini USB转串口),纯PS,通过串口打印出HelloWorld,工程虽小,五脏俱全,算是一种朝圣。配置要和板子对应,大家注意修改。
操作步骤:
硬件部分
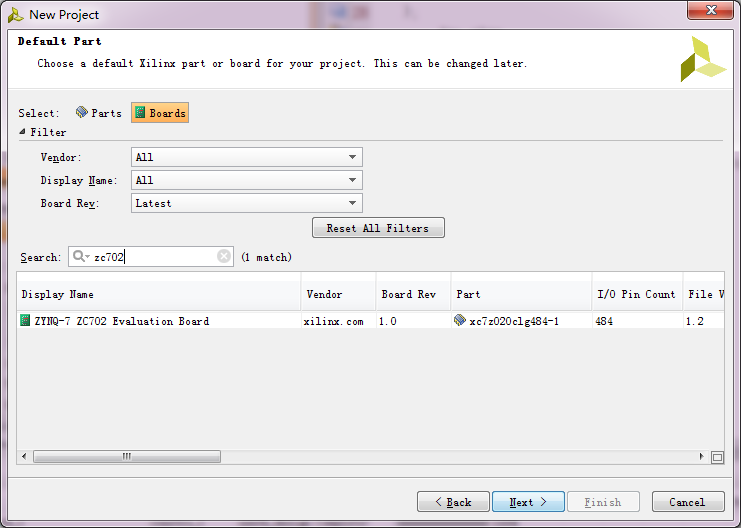
1. 新建Vivado工程。选择芯片型号xc7z020clg484_1或者点击Boards选择zc702
2.单击Create Block Design, 命名

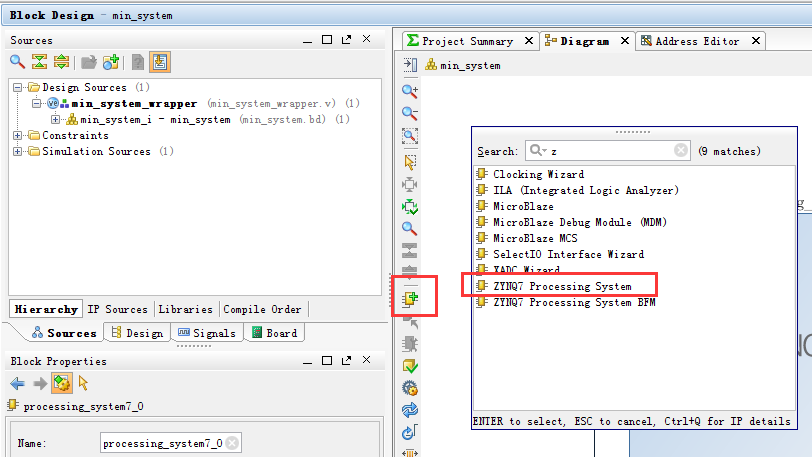
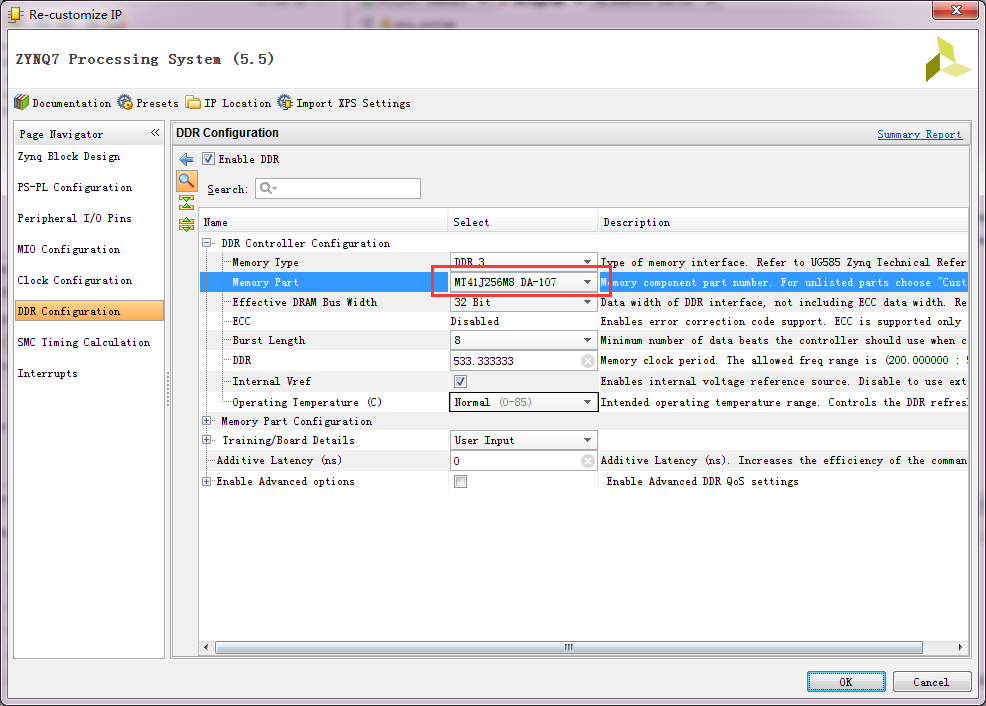
3.添加IP,ZYNQ7 Processing System
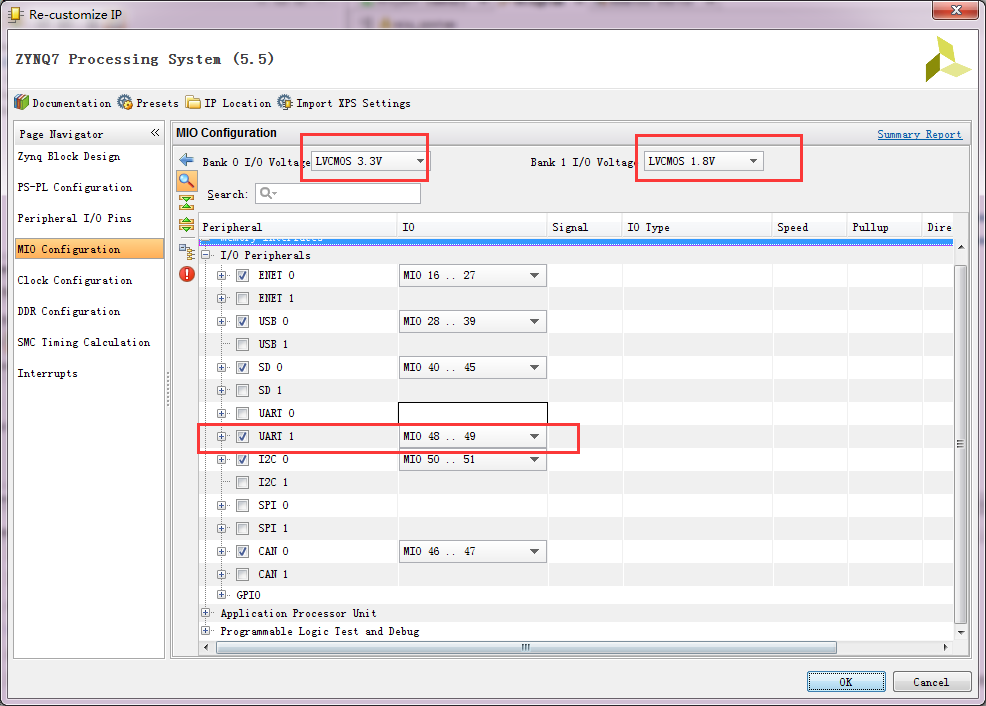
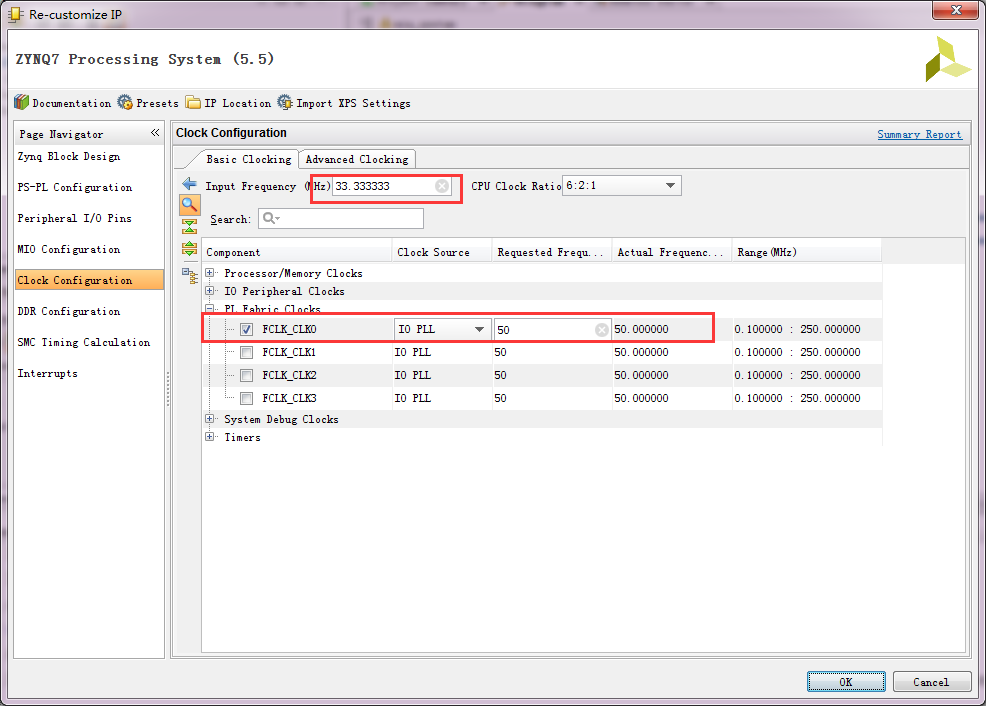
4.双击添加的IP,设置如下(主要是设置时钟,内存,输出,默认设置就省略不介绍了,红色部分要设置对):
5.单击上方蓝字Run Block Automation ,然后将鼠标放在引脚处, 鼠标变成铅笔后迚行拖拽连线,这是给PL时钟,完全可以不连,本实验用不到。


6.右击 .bd文件, 单击Generate Output Products
点击Generate:

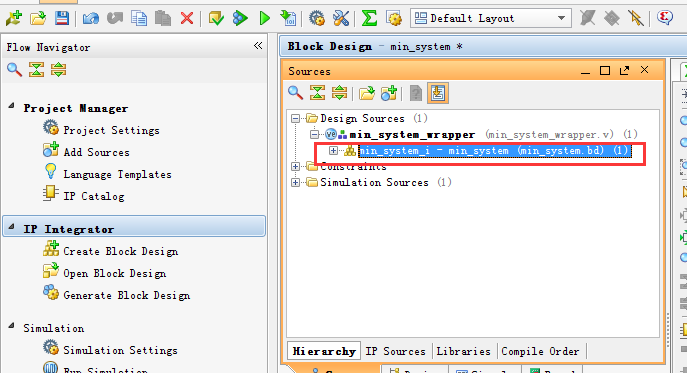
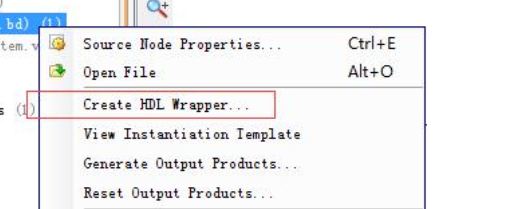
7.右击 .bd文件, 选择Create HDL Wrapper ,产生顶层文件,选择 Let Vivado manager wrapper and auto-update 点击OK

8. 产生Bit文件

9.File->Export->Export Hardware,勾选 Include bitstream ,点击OK
10.File->Launch SDK
软件部分
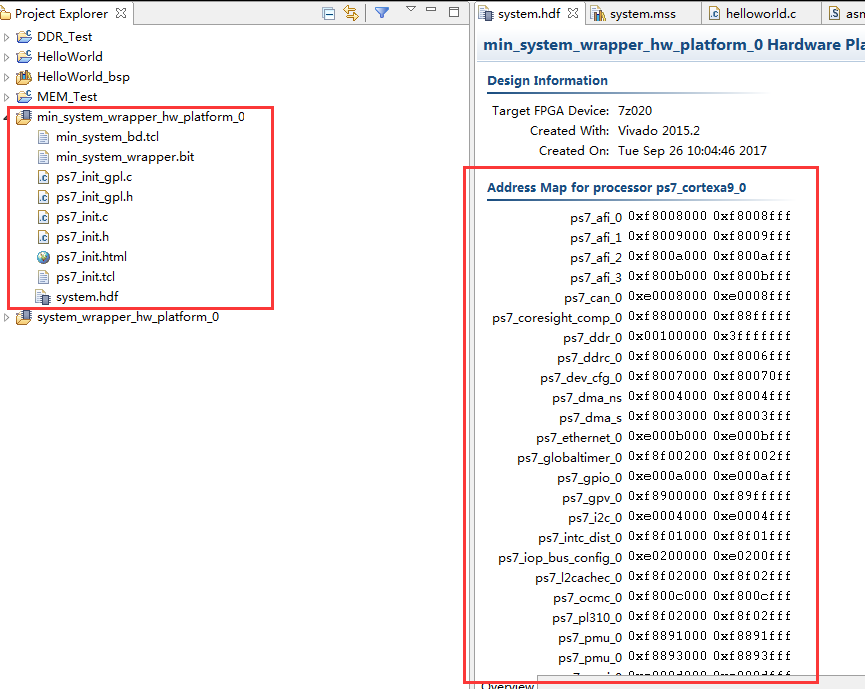
定制的硬件和地址空间分配
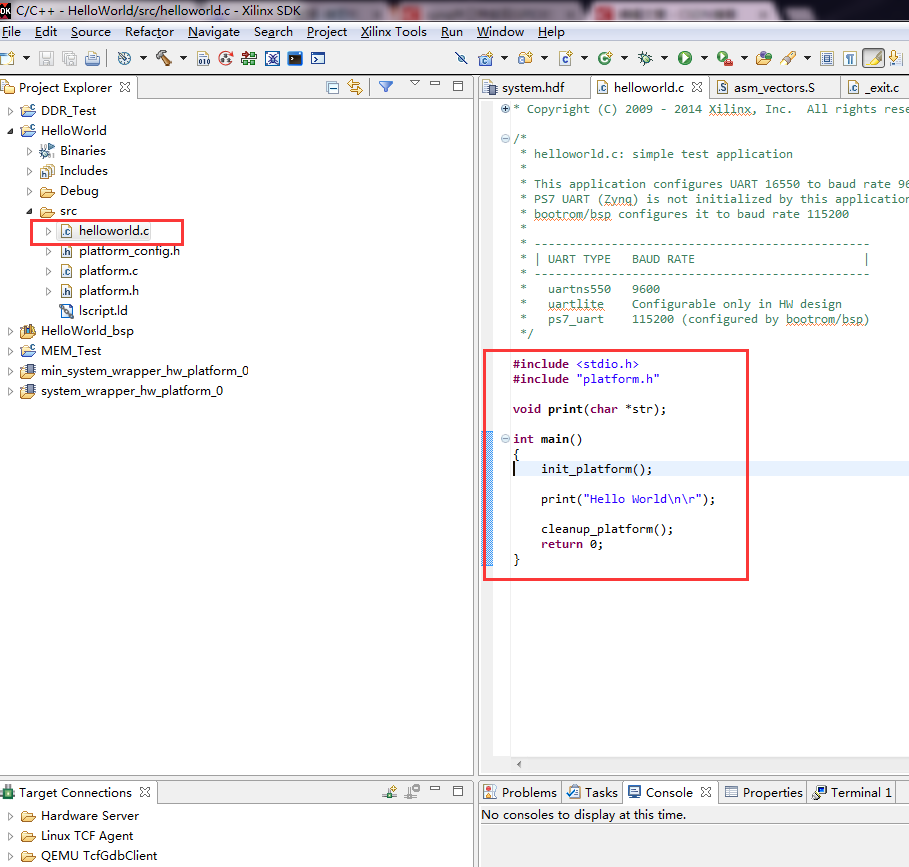
1.File->New->Application Project ,命名,点击next,选择自带的模板HelloWorld

查看一下生成的代码
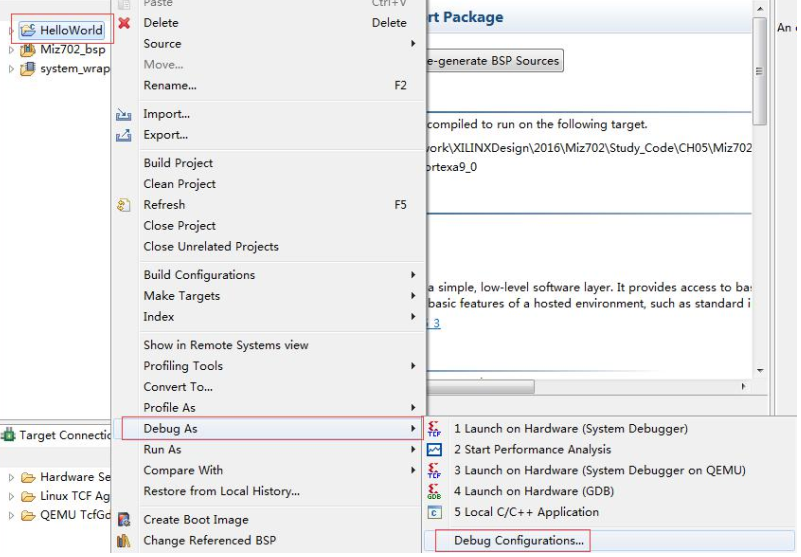
2.右击项目名,Debug as-->Debufg Configuration
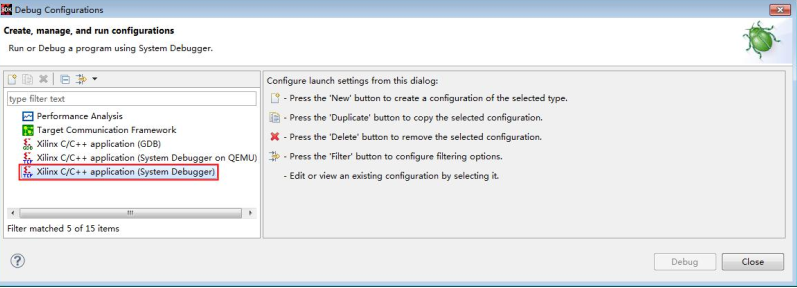
3.双击
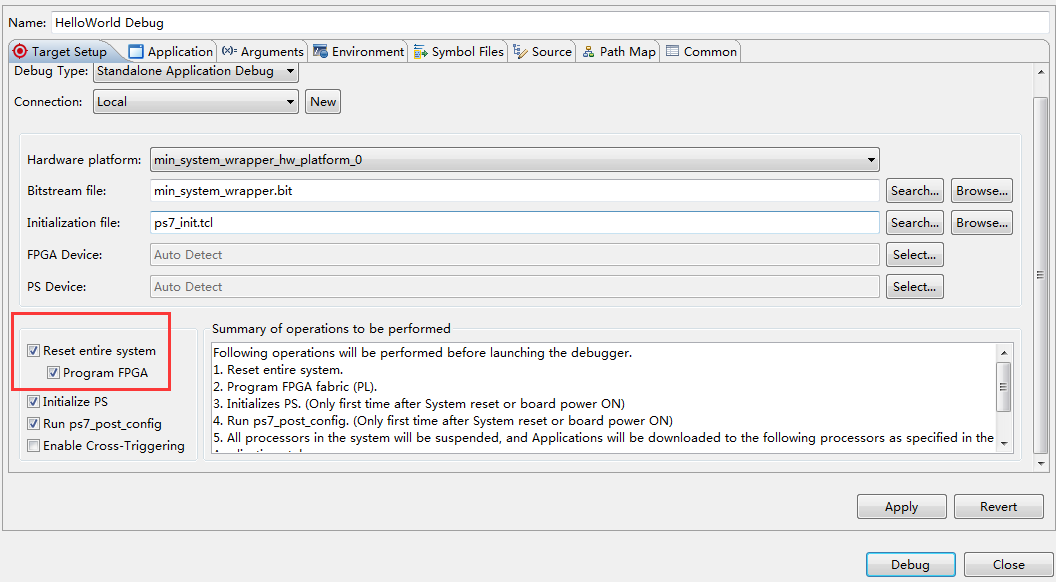
4,勾选,FPGA上电,点击Apply,点击Debug
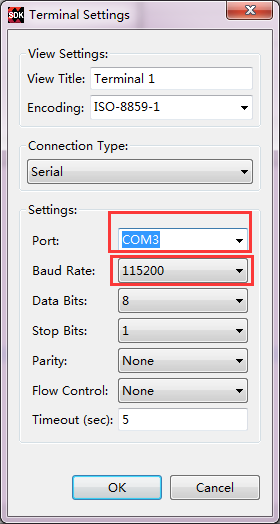
5.Debug界面(右上角可切换)里的Terminal窗口 设置端口(自动识别),波特率(115200),连接串口

6.Debug界面 点击这个启动程序

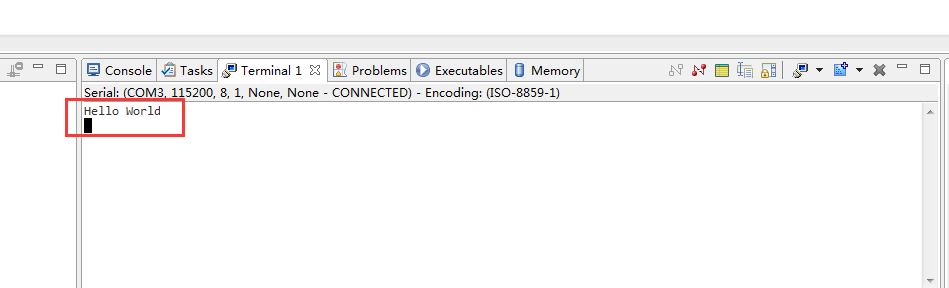
7.在串口调试助手串口Terminal里可见看见打印的信息
或者直接run:
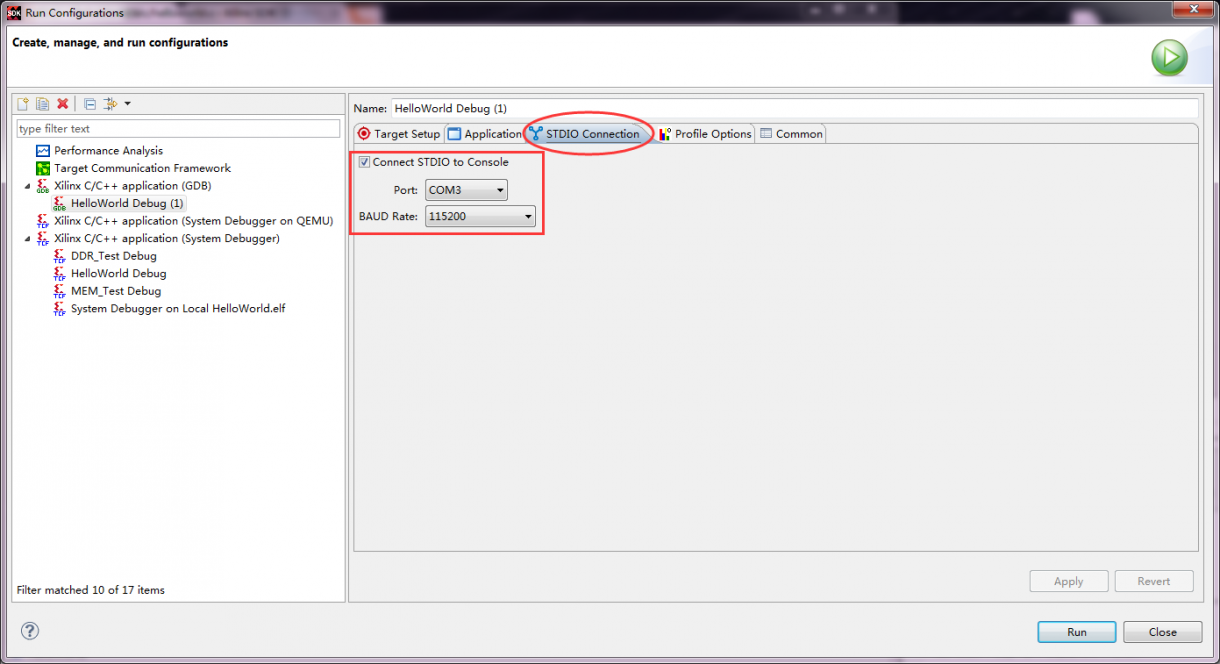
右击工程名-->run as -->run configrations
双击红色框选项:

在STDIO Connection窗口设置串口信息:
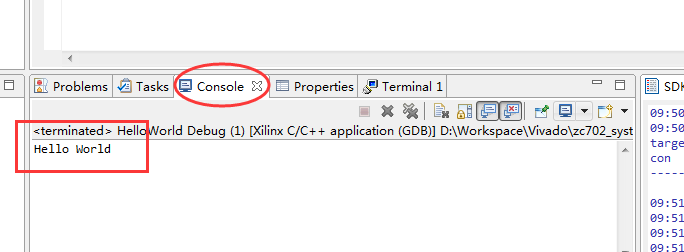
点击Apply,点击Run,在Console窗口可以看见打印的信息:
总结:
Vivado+SDK设计流程初识,里面的每一步要在后续过程中理解是什么意思,就不会云里雾里了。软件部分的编程也是今后学习的一个要点。
本文转载自: https://blog.csdn.net/u014485485/article/details/78107003